Comfy UI
Introduction to Comfy UI
Installation: ComfyUI on KITeGG Server
1. Clone ComfyUI GitHub Repository
1. Open a terminal
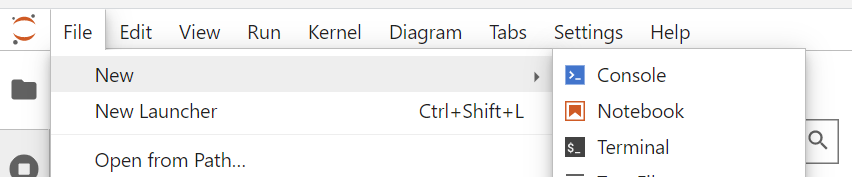
2. Download the ComfyUI repository
In Terminal, run this command:
git clone https://github.com/comfyanonymous/ComfyUIIn Terminal, run these commands (one after the other):
cd ComfyUI/custom_nodesgit clone https://github.com/ltdrdata/ComfyUI-Manager2. Run ComfyUI
2.1. Adapt Notebook for running it on the KITeGG Server
Path: ComfyUI/custom_nodes/ComfyUI-Manager/notebooks/comfyui_colab_with_manager.ipynb
2. Make following changes to the notebook (pink Markups are going to be changed):
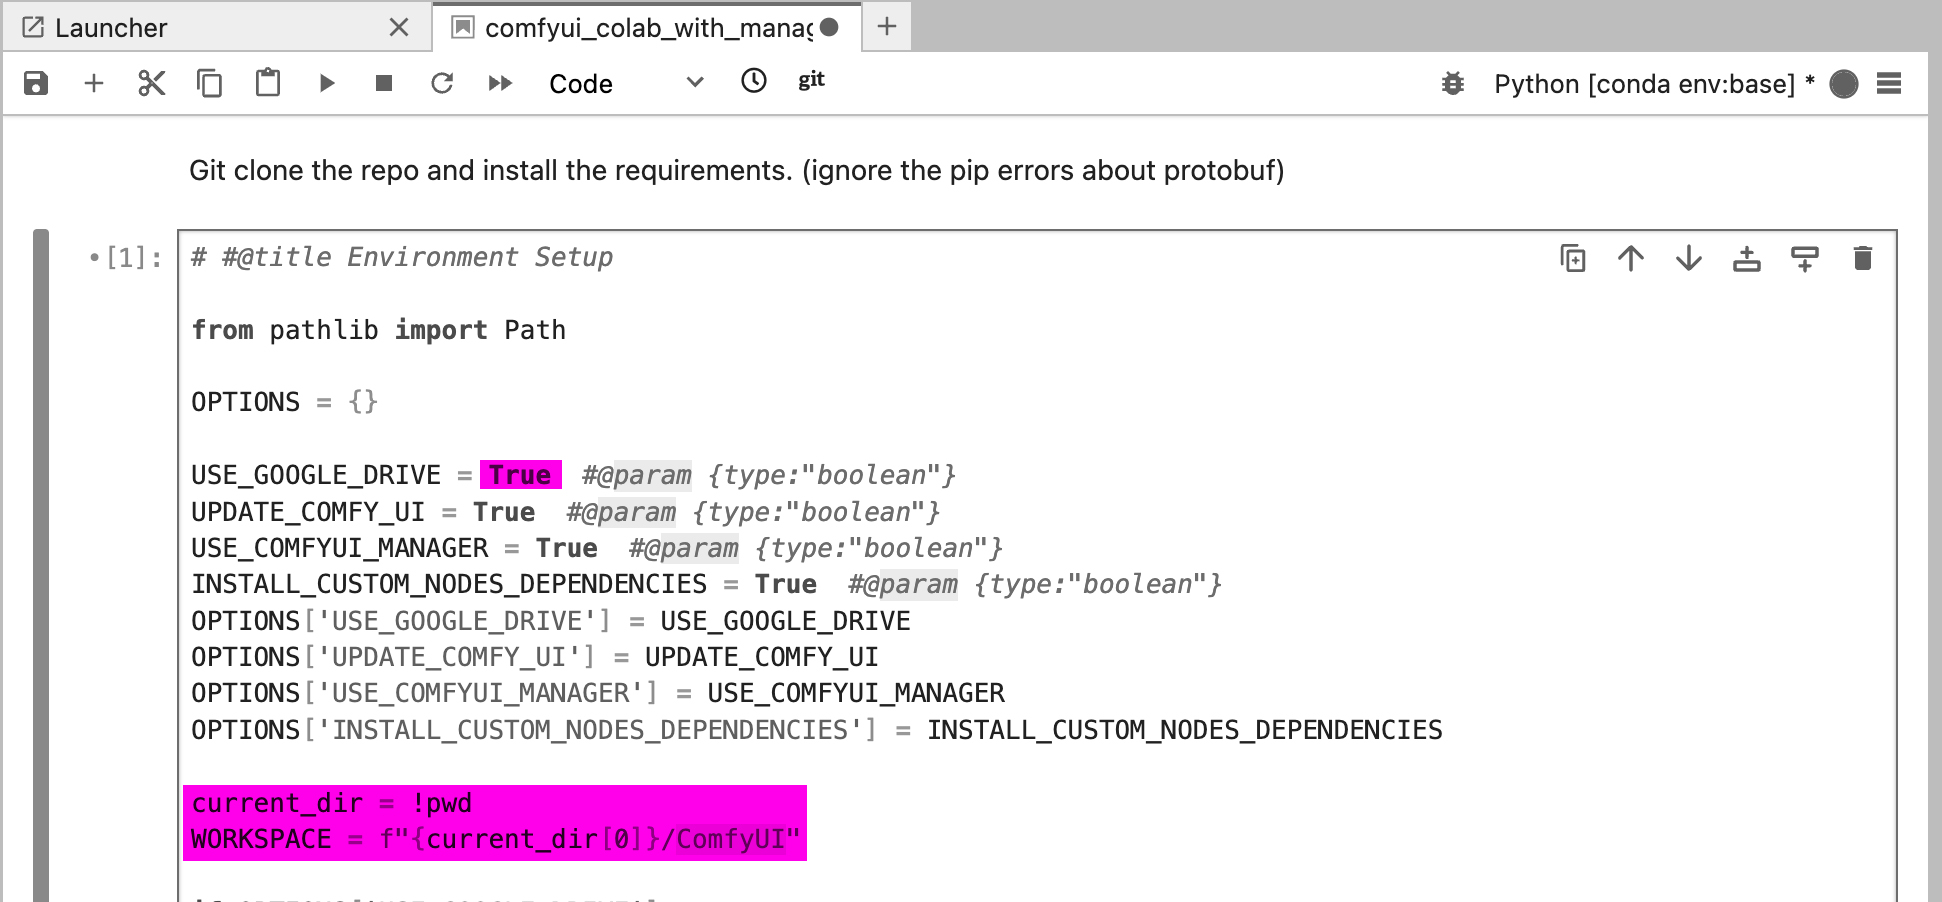
a) Disable Google Drive Connection (Set USE_GOOGLE_DRIVE = "False")
Delete: USE_GOOGLE_DRIVE = True #@param {type:"boolean"}
Paste: USE_GOOGLE_DRIVE = False #@param {type:"boolean"}
b) Change Workspace Location (Set WORKSPACE = '~/ComfyUI')
Delete: current_dir = !pwd
Delete: WORKSPACE = f"{current_dir[0]}/ComfyUI"
Paste: WORKSPACE = '~/ComfyUI'
3. Check and Run
a) Make sure the code looks like this:
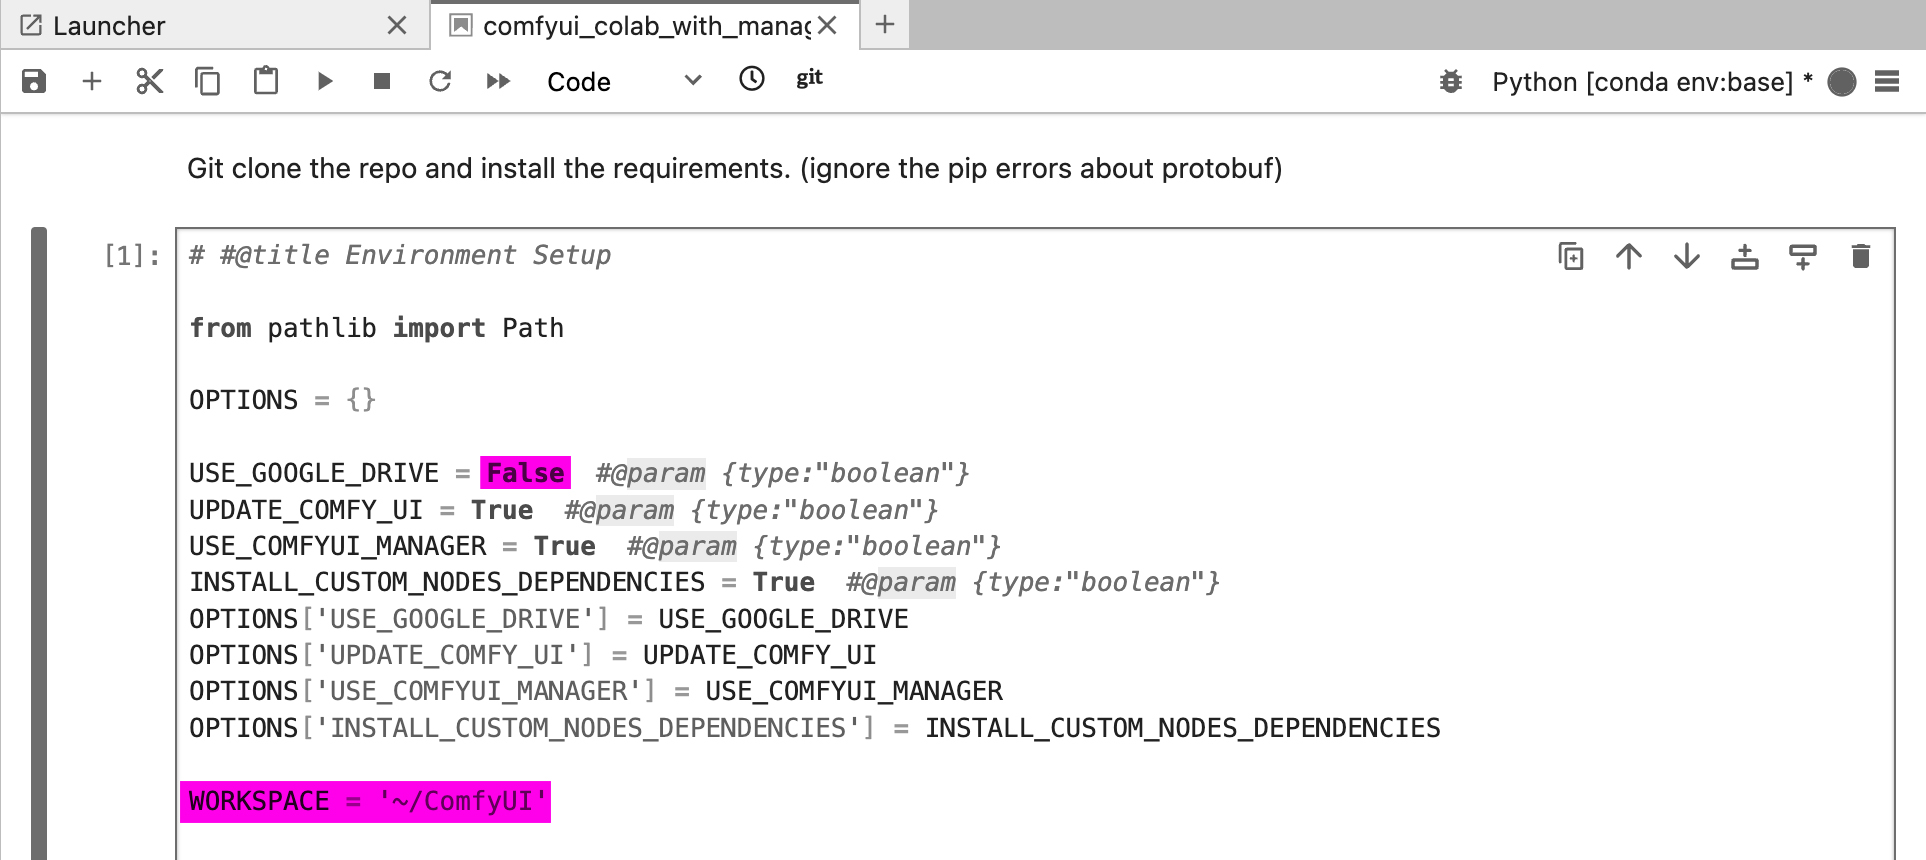
b) save the notebook changes ⌘S
c) run the cell ⇧↵
2.2. Install Models
1. Go to the Second Cell
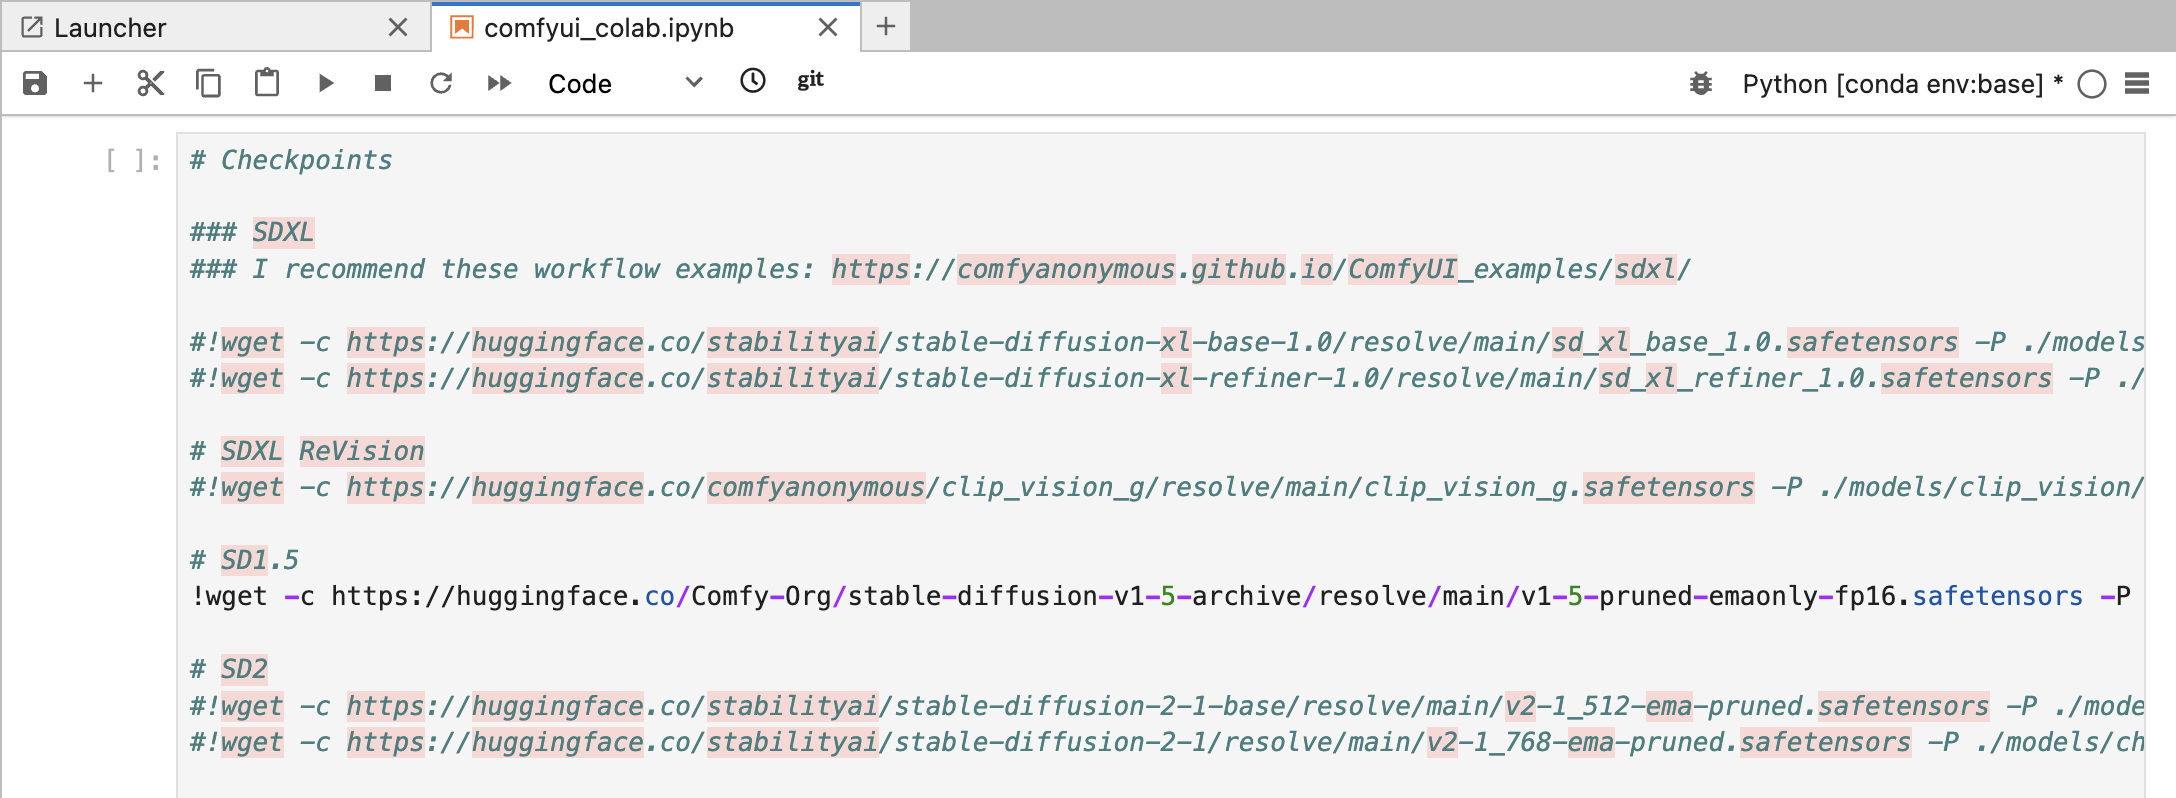
2. Uncomment the models you want to install (delete the "#" in front of the lines)
you can always install more models later
3. run the cell ⇧↵
2.3. Install ControlNet Preprocessor
open Terminal, paste and run code:
cd ComfyUI/custom_nodes/git clone https://github.com/Fannovel16/comfyui_controlnet_aux/cd comfyui_controlnet_auxpip install -r requirements.txtif this does not work, check for updates in the Installation guide at https://github.com/Fannovel16/comfyui_controlnet_aux?tab=readme-ov-file#alternative.
2.4. Open Comfy UI
0. (If you did 2.4.: Go back to the Notebook)
1. Run the last cell "ComfyUI with cloudflared"
2. In the terminal code, search for the URL to access ComfyUI (https://xxxx-xxxxx-xxxx.trycloudflare.com) and copy it to your browser.
3. Always stop your server (important)!
At end of use, please do not forget to stop your server. It uses a lot of energy. Thanks:)
To do so go to File > Hub Control Panel > Stop My Server
Hints
Opening ComfyUI after initial installation
(no Terminal needed)
-
Open the Notebook like before
Path:
ComfyUI/custom_nodes/ComfyUI-Manager/notebooks/comfyui_colab_with_manager.ipynb -
Run All Three Cells (wait for Processes to complete before running next cell)
add more models by uncommenting them in the 2nd cell if you like
-
In the terminal code of the last cell, search for the
URL to access ComfyUI(https://xxxx-xxxxx-xxxx.trycloudflare.com) and copy it to your browser.
Tutorial recommendation: Olivio Sarikas - Learn ComfyUI Playlist (1 - 8)
Desktop App Installation
1. Download and Install App
https://www.comfy.org/download
Download the app, follow installation instructions, start Prompting
2. Add Models
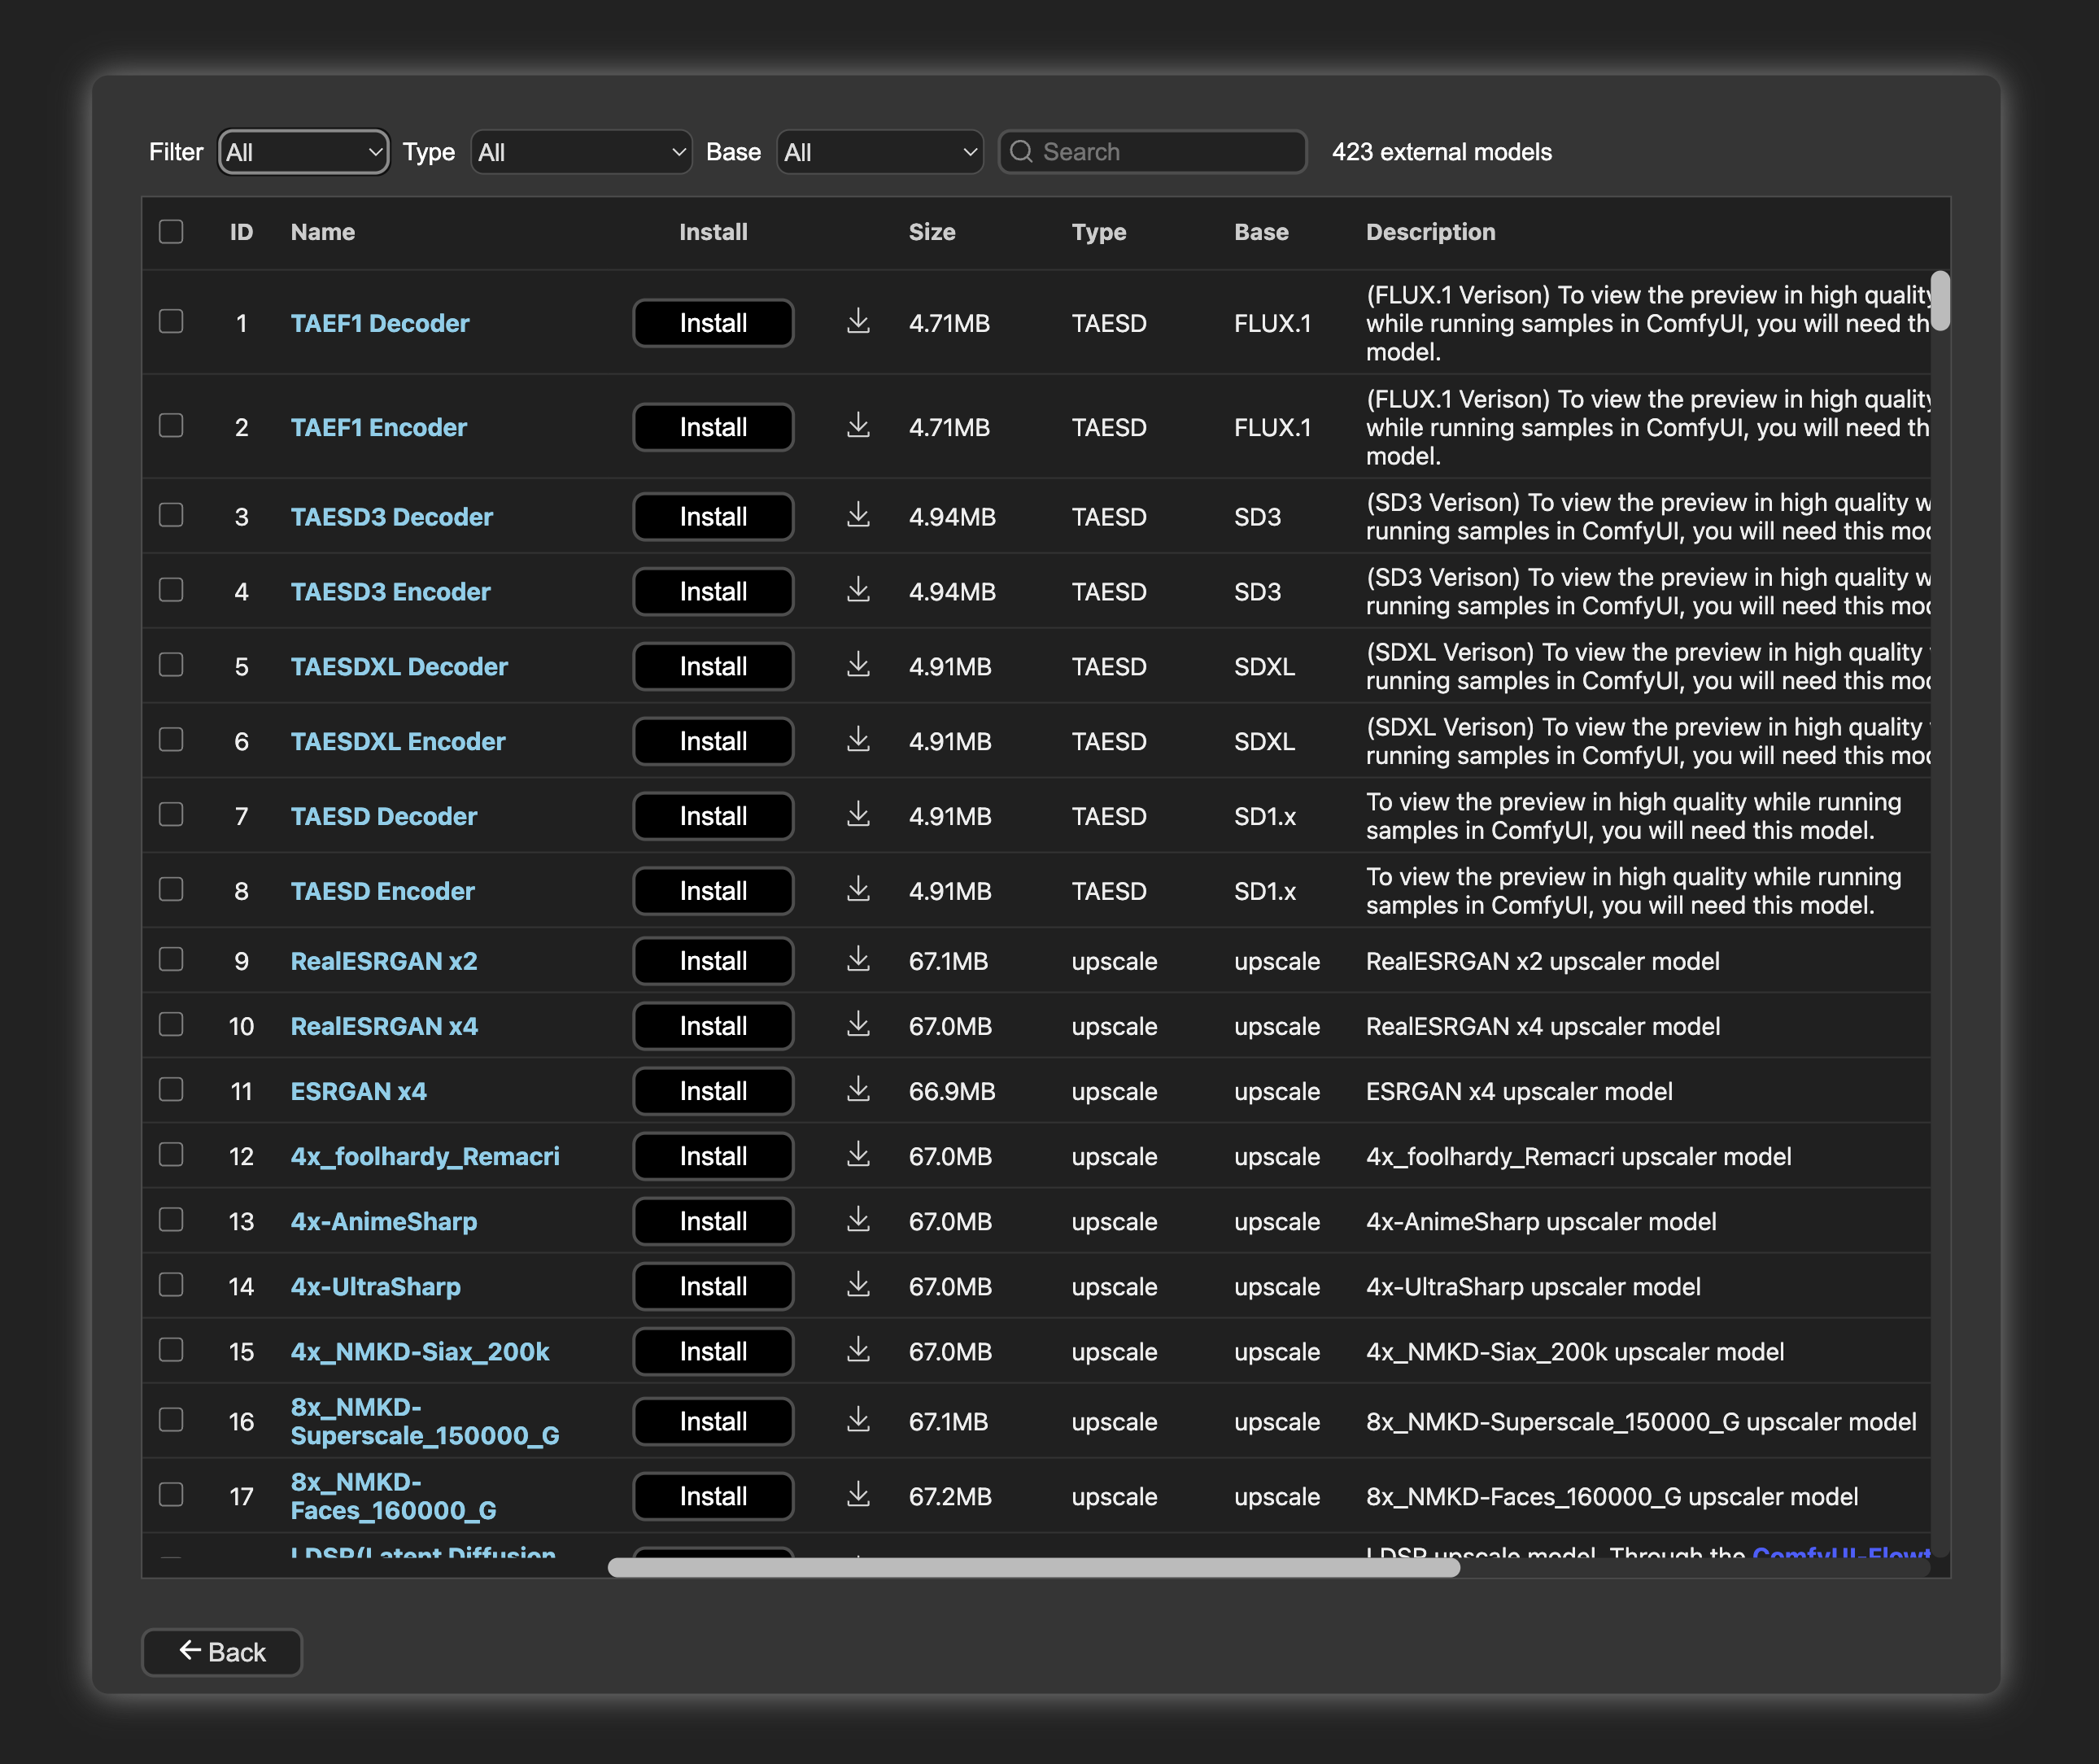
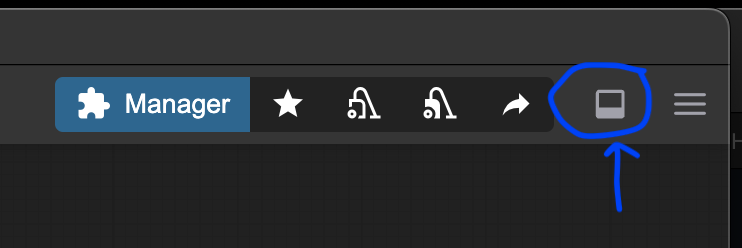
2.1. Open ComfyUI Manager, go to Model Manager

In the top right corner of the app window click "Manager".

Open the Model Manager
2.2. Install Model, then Click Refresh and Restart the App
3. Install Control Net Preprocessor
3.1. Open In-App-Terminal
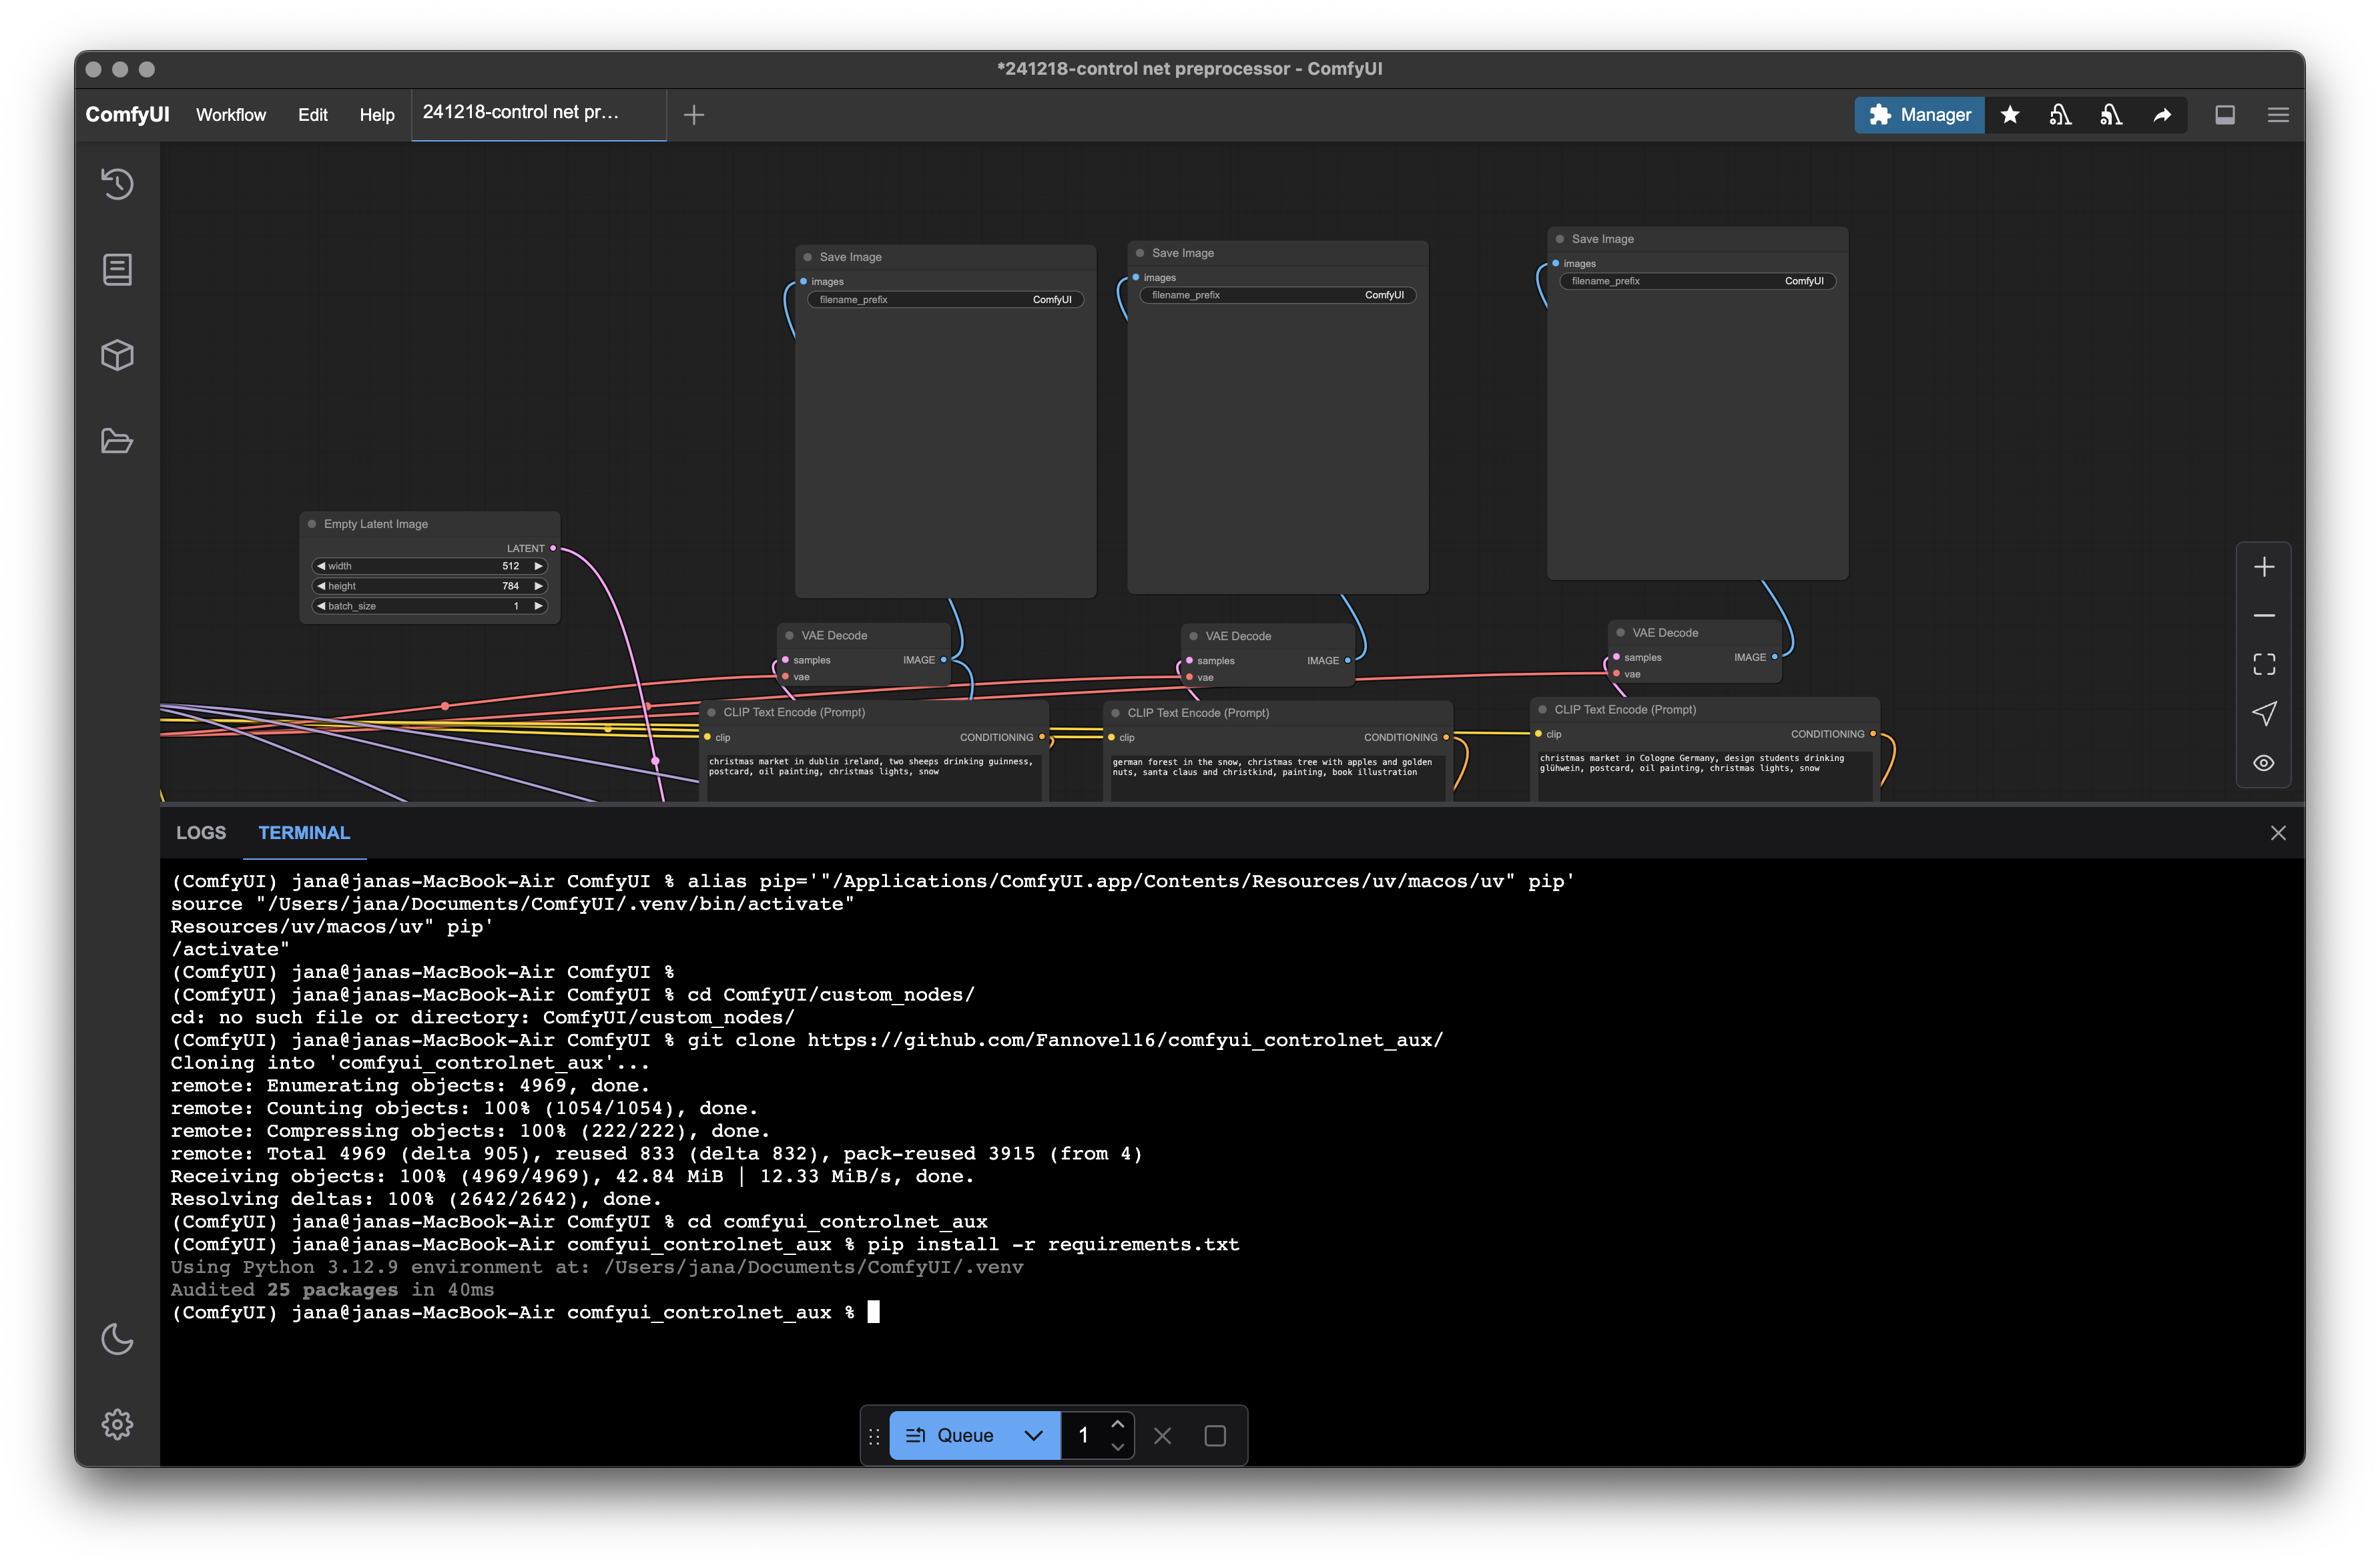
3.2. paste and run code:
pip install -r requirements.txtcd comfyui_controlnet_auxgit clone <https://github.com/Fannovel16/comfyui_controlnet_aux/>cd ComfyUI/custom_nodes/Get to know ComfyUI
Workflows
To get started in ComfyUI, the most fun way is maybe to just open some Workflows and see what you can do. This page is here to give you some Ideas of what you might try.
Example Workflows provided in ComfyUI
Go to Workflow > Browse Templates
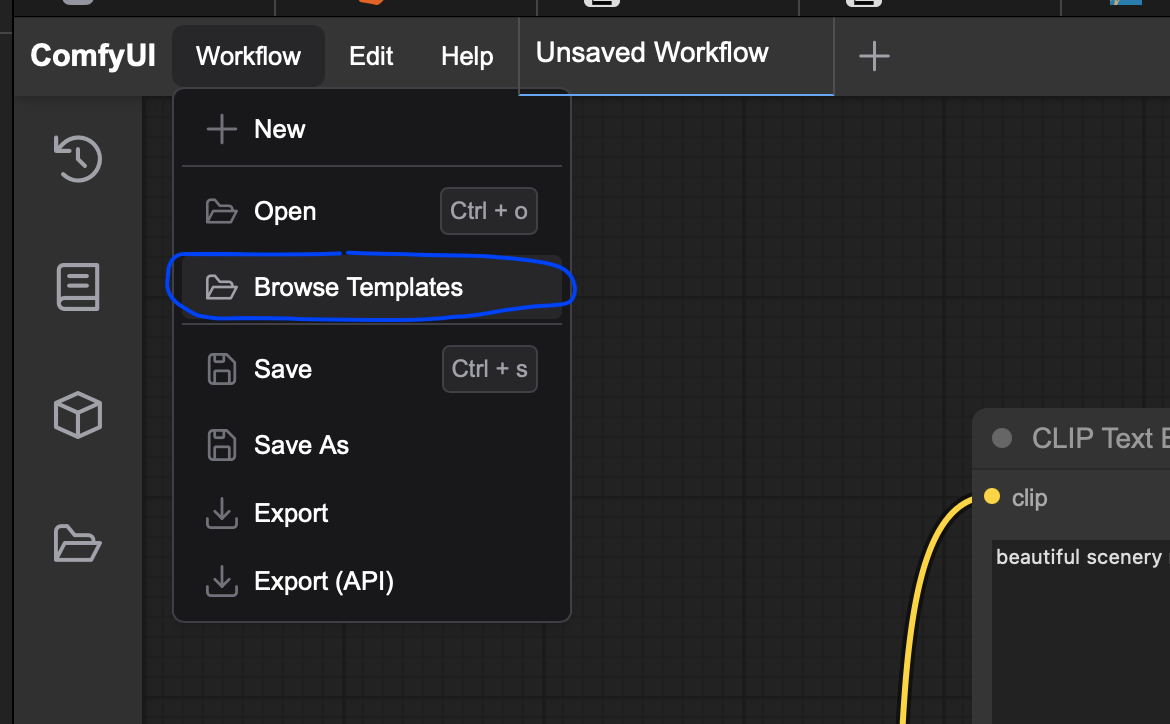
Choose from a vide variety of templates.
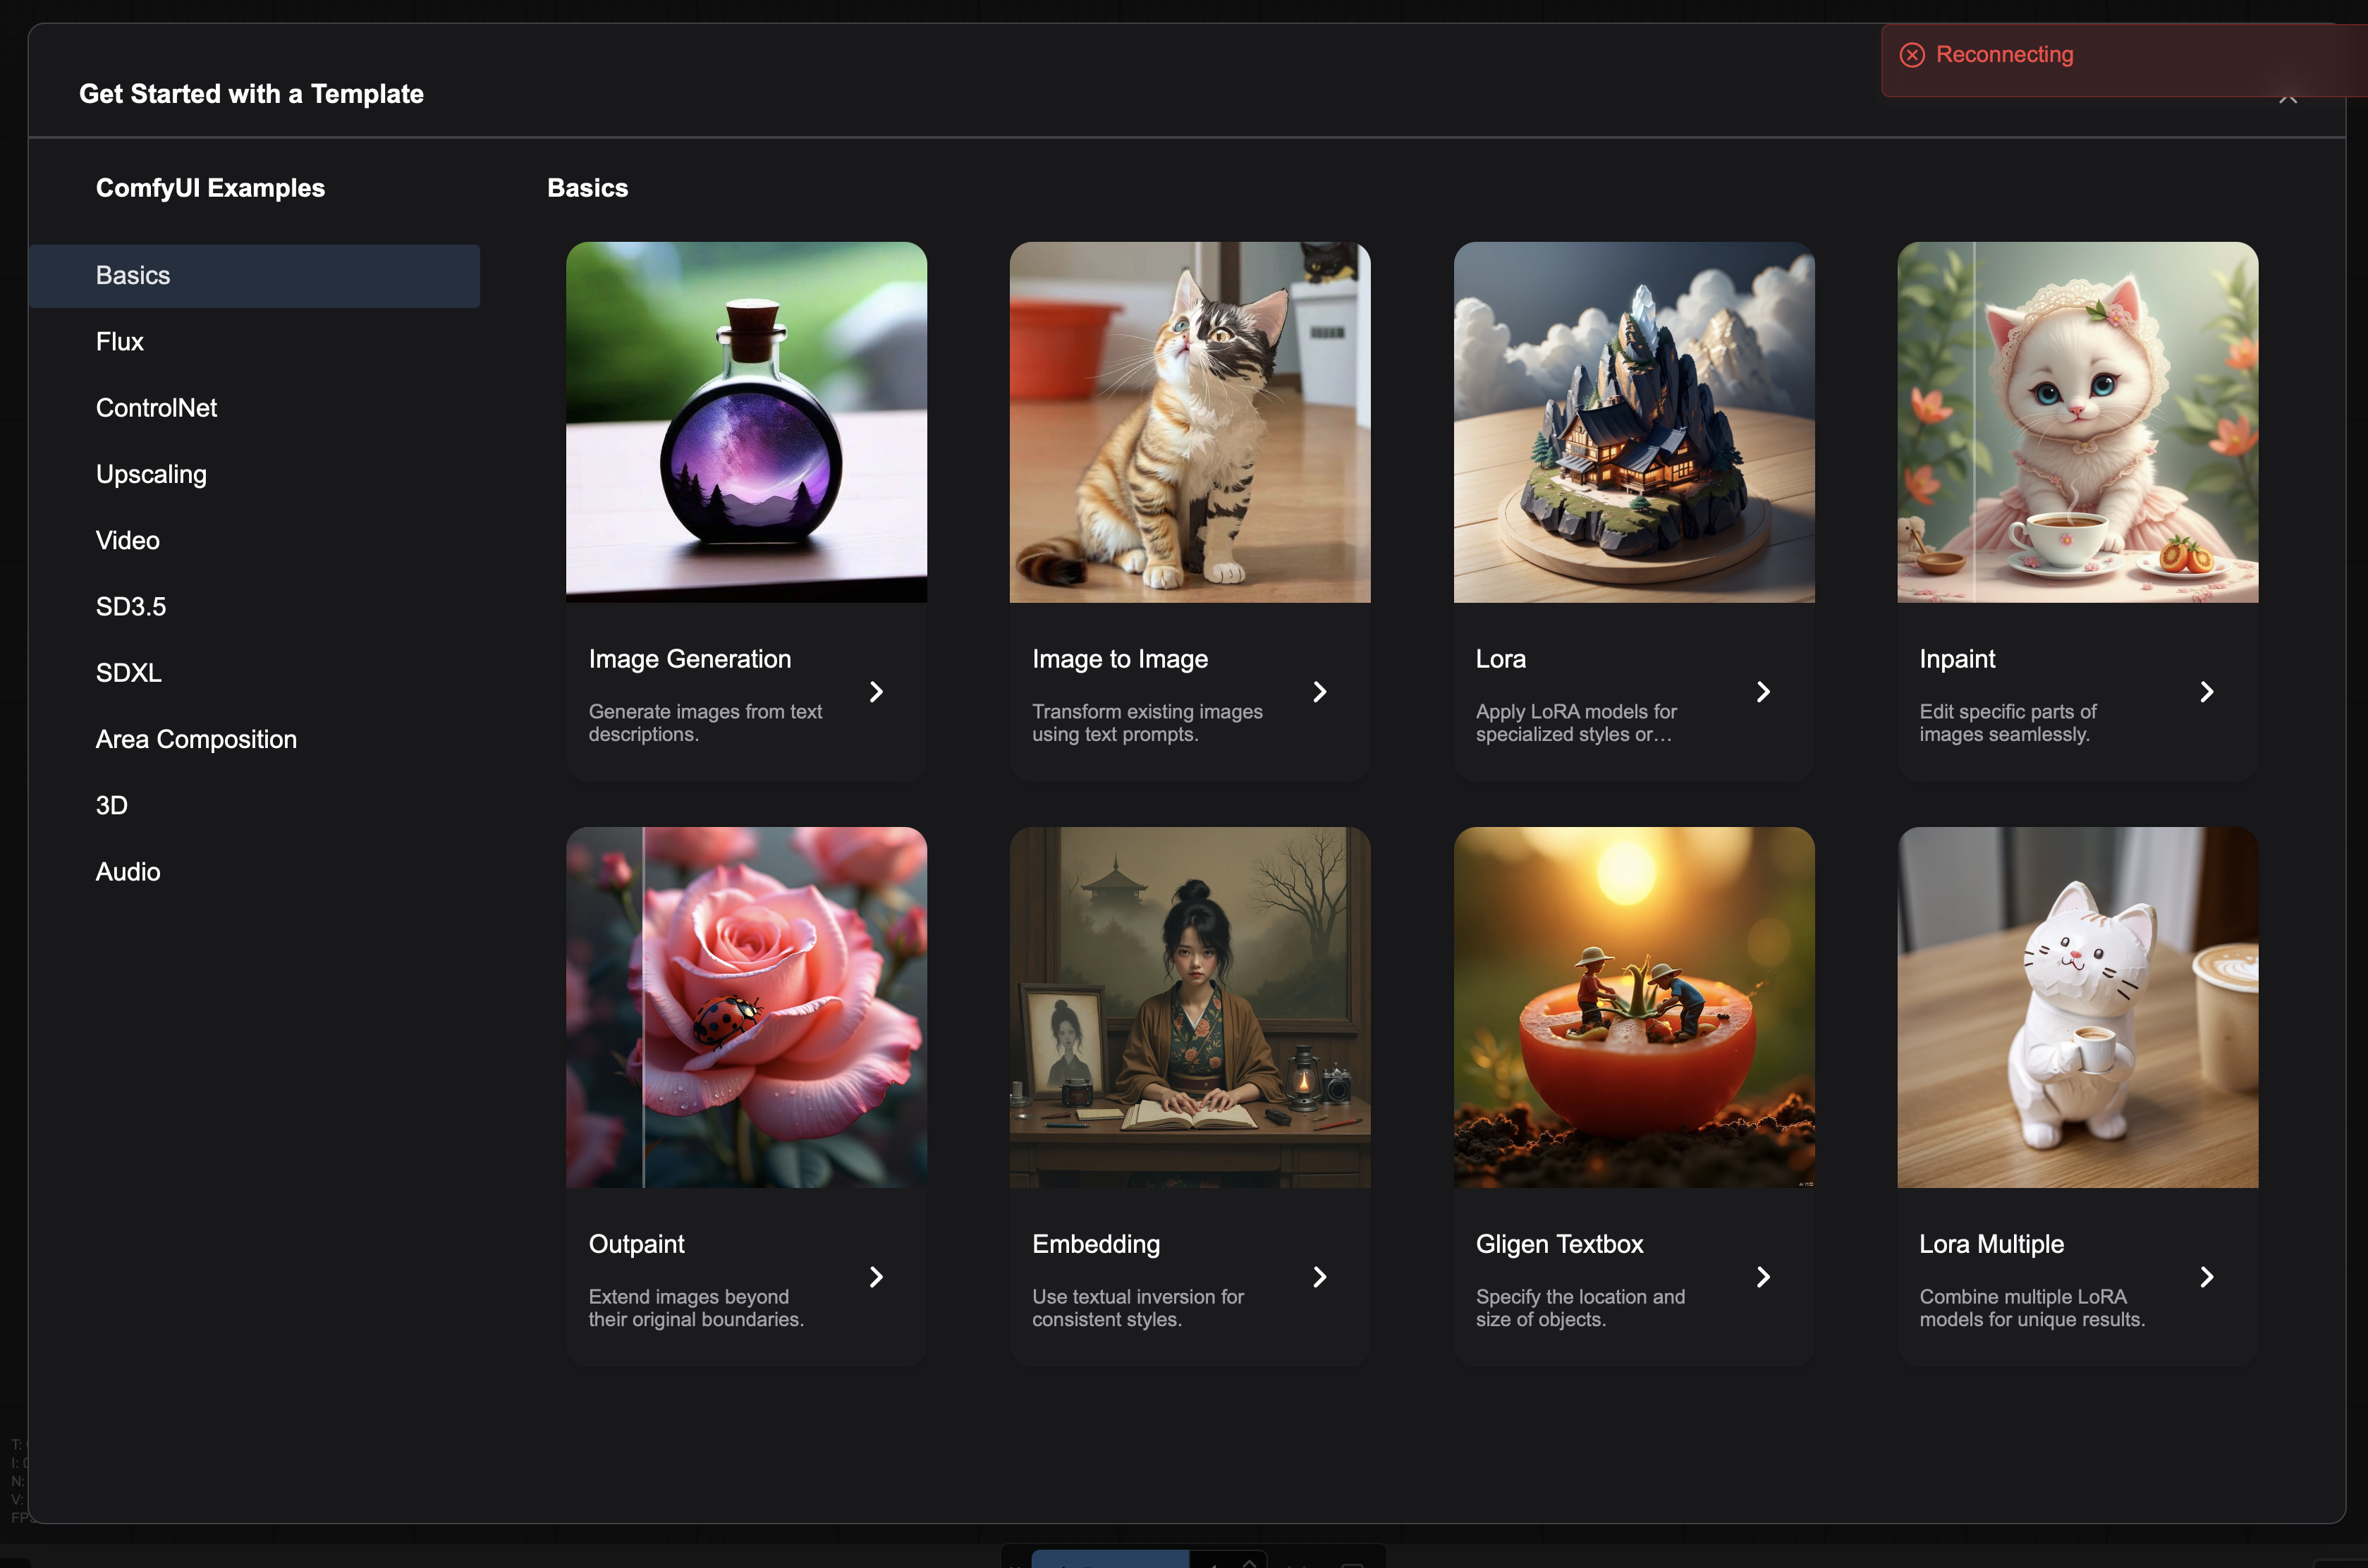
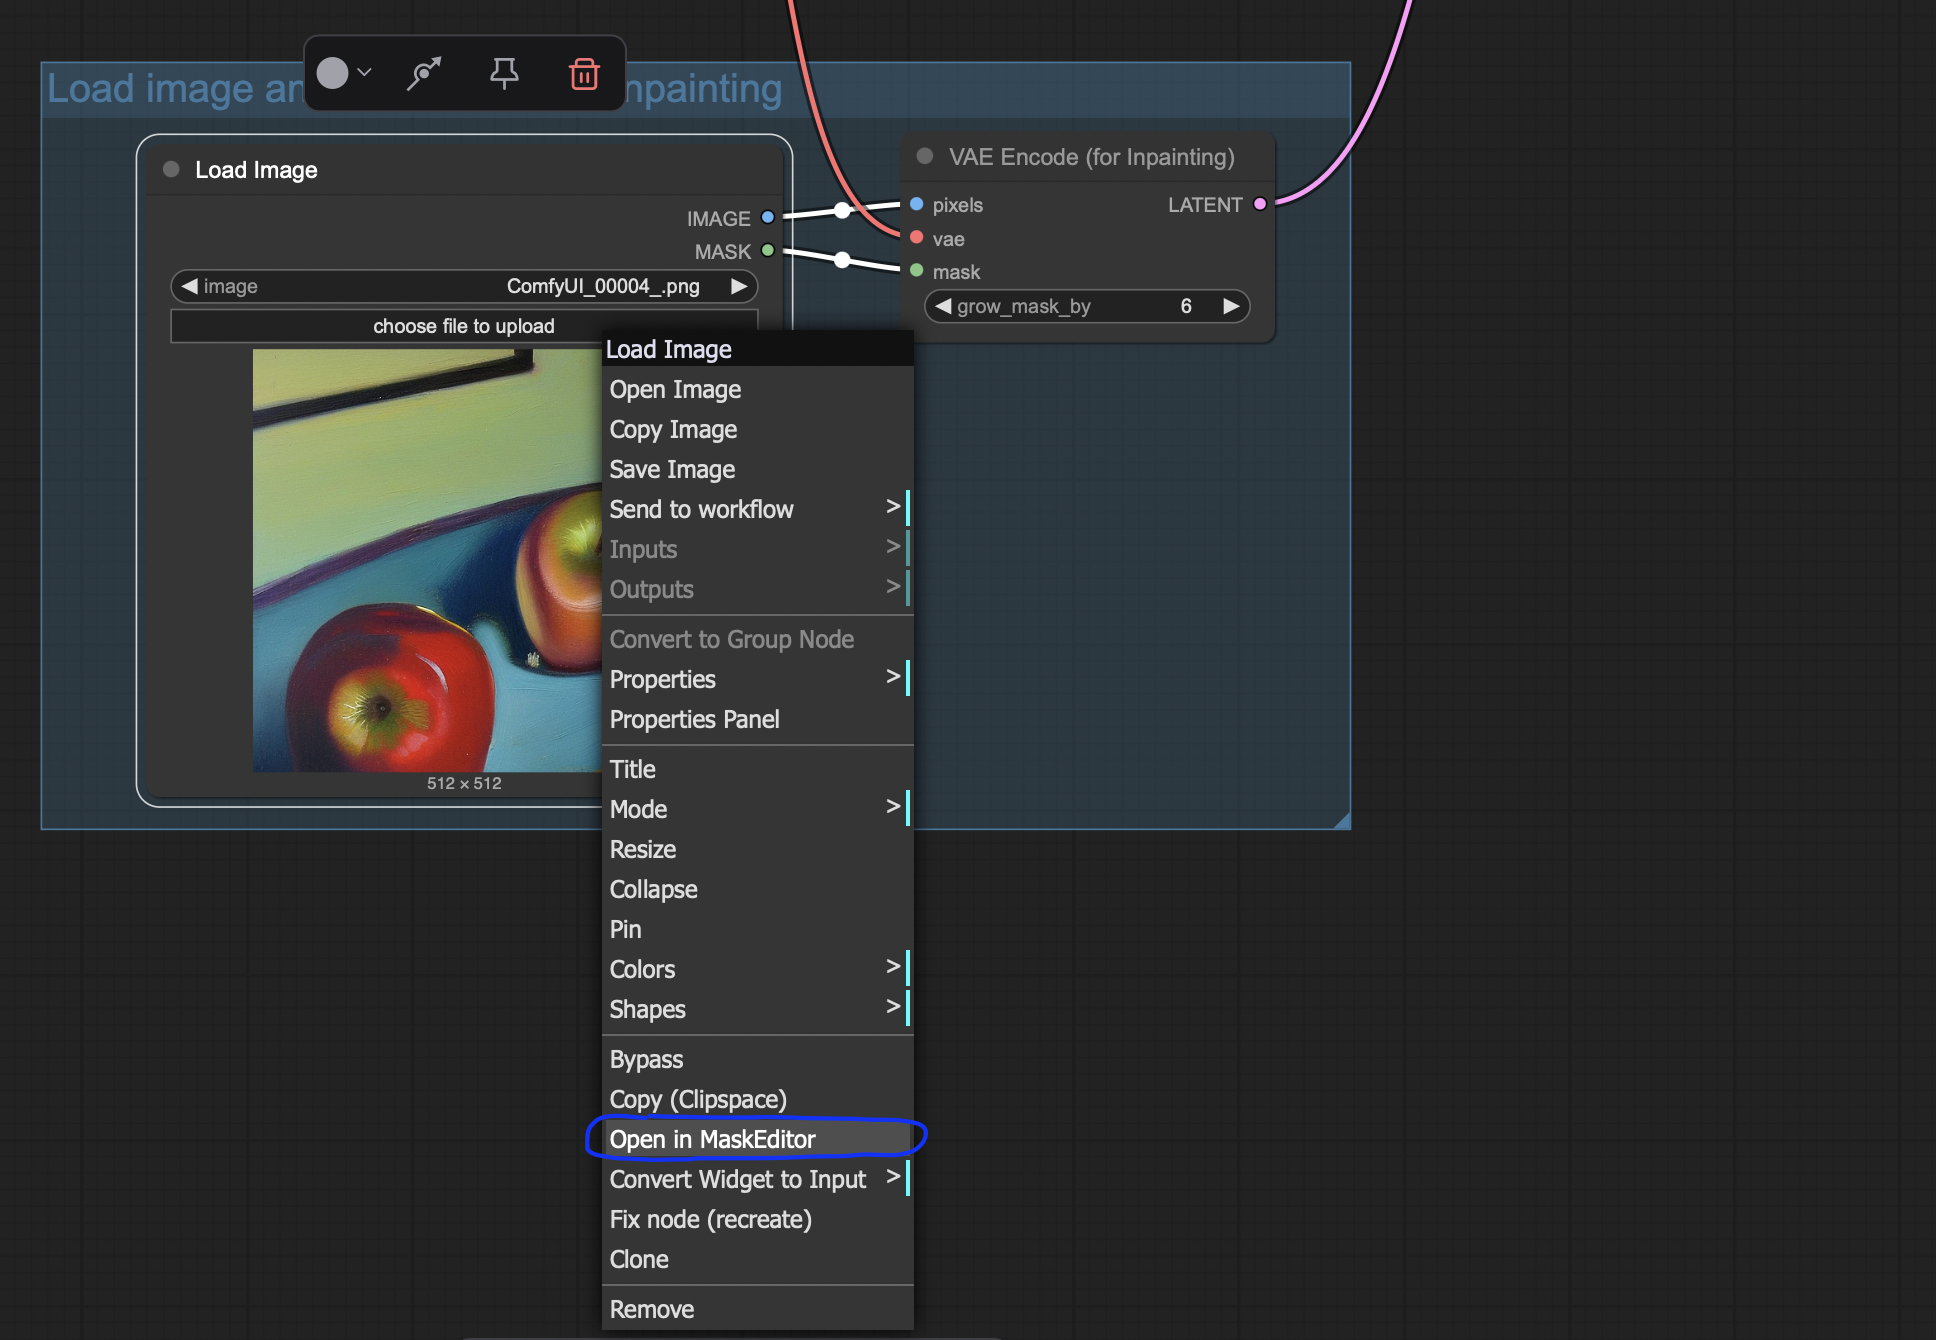
Image Masking (Replace part of an Image)
If you want to change just a part of a picture, Comfy UI has a simple Workflow that lets you draw a mask.
- Like above, go to
Workflow > Browse Templates, then selectBasics > Inpaint - In the Load Image Node (see image above), click
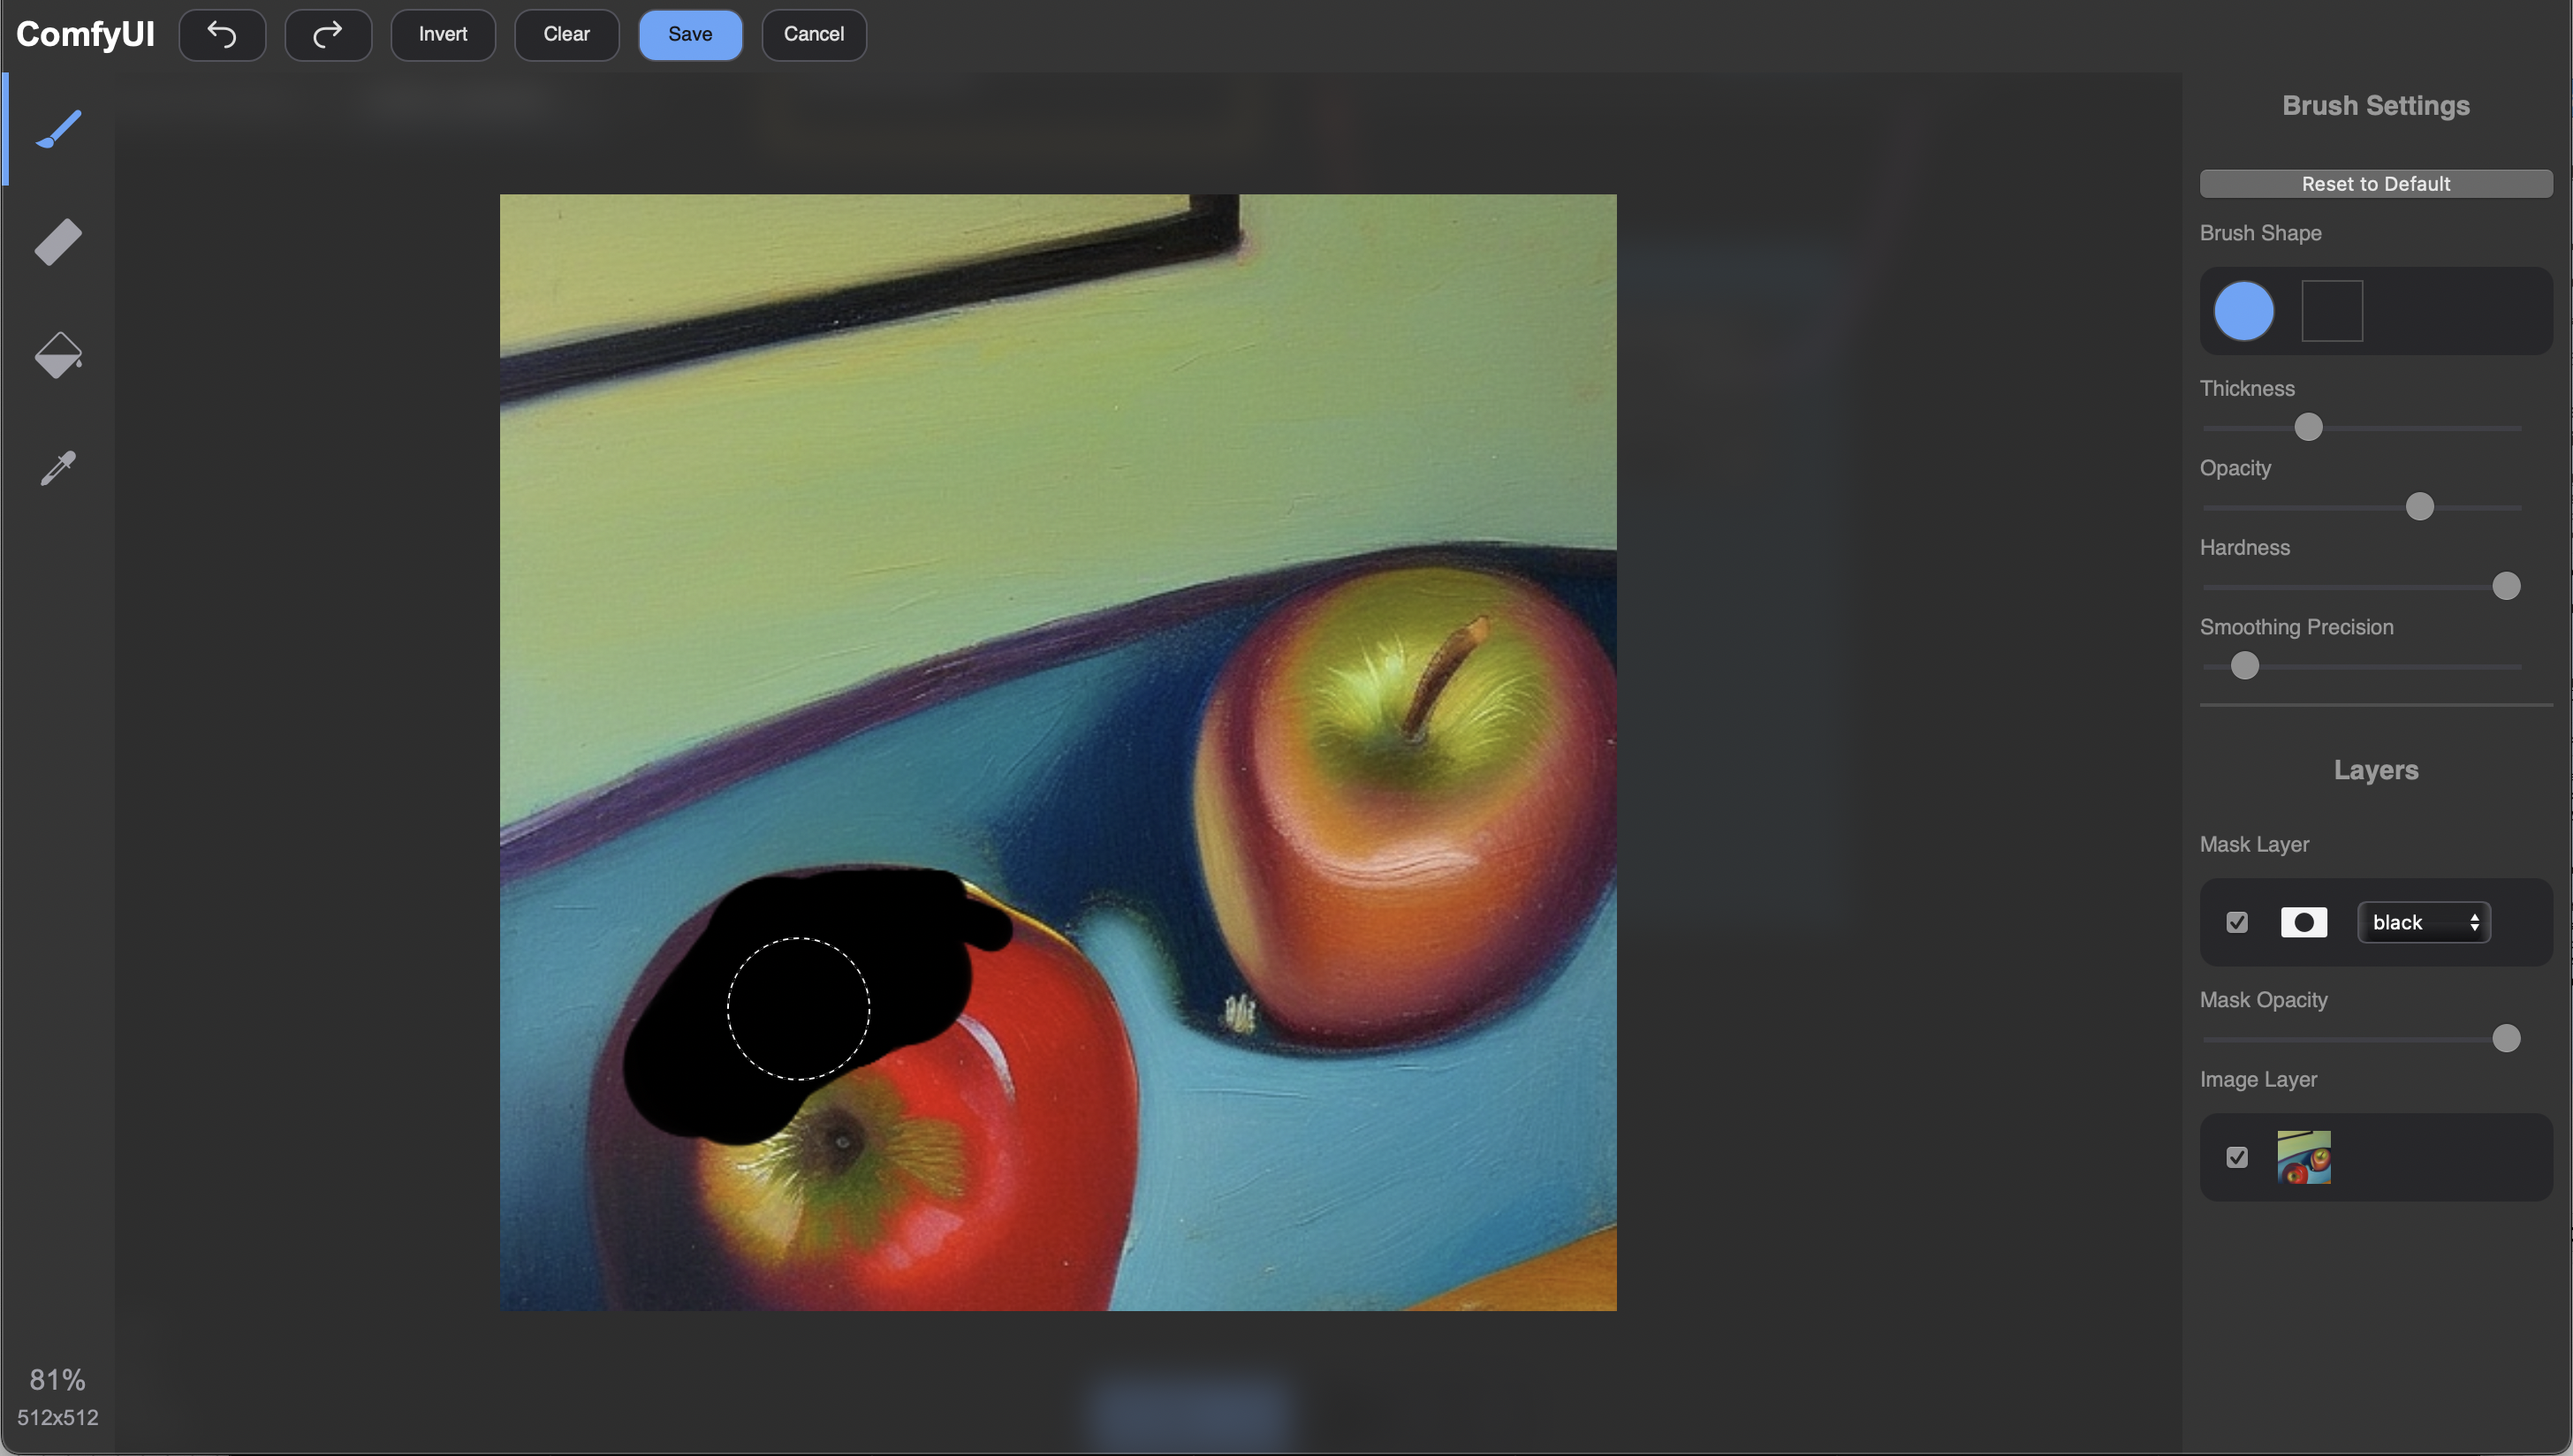
choose file to upload, then select a file from your local device. - Right-click on the Node, select
Open in MaskEditor - Edit Mask, then click
save
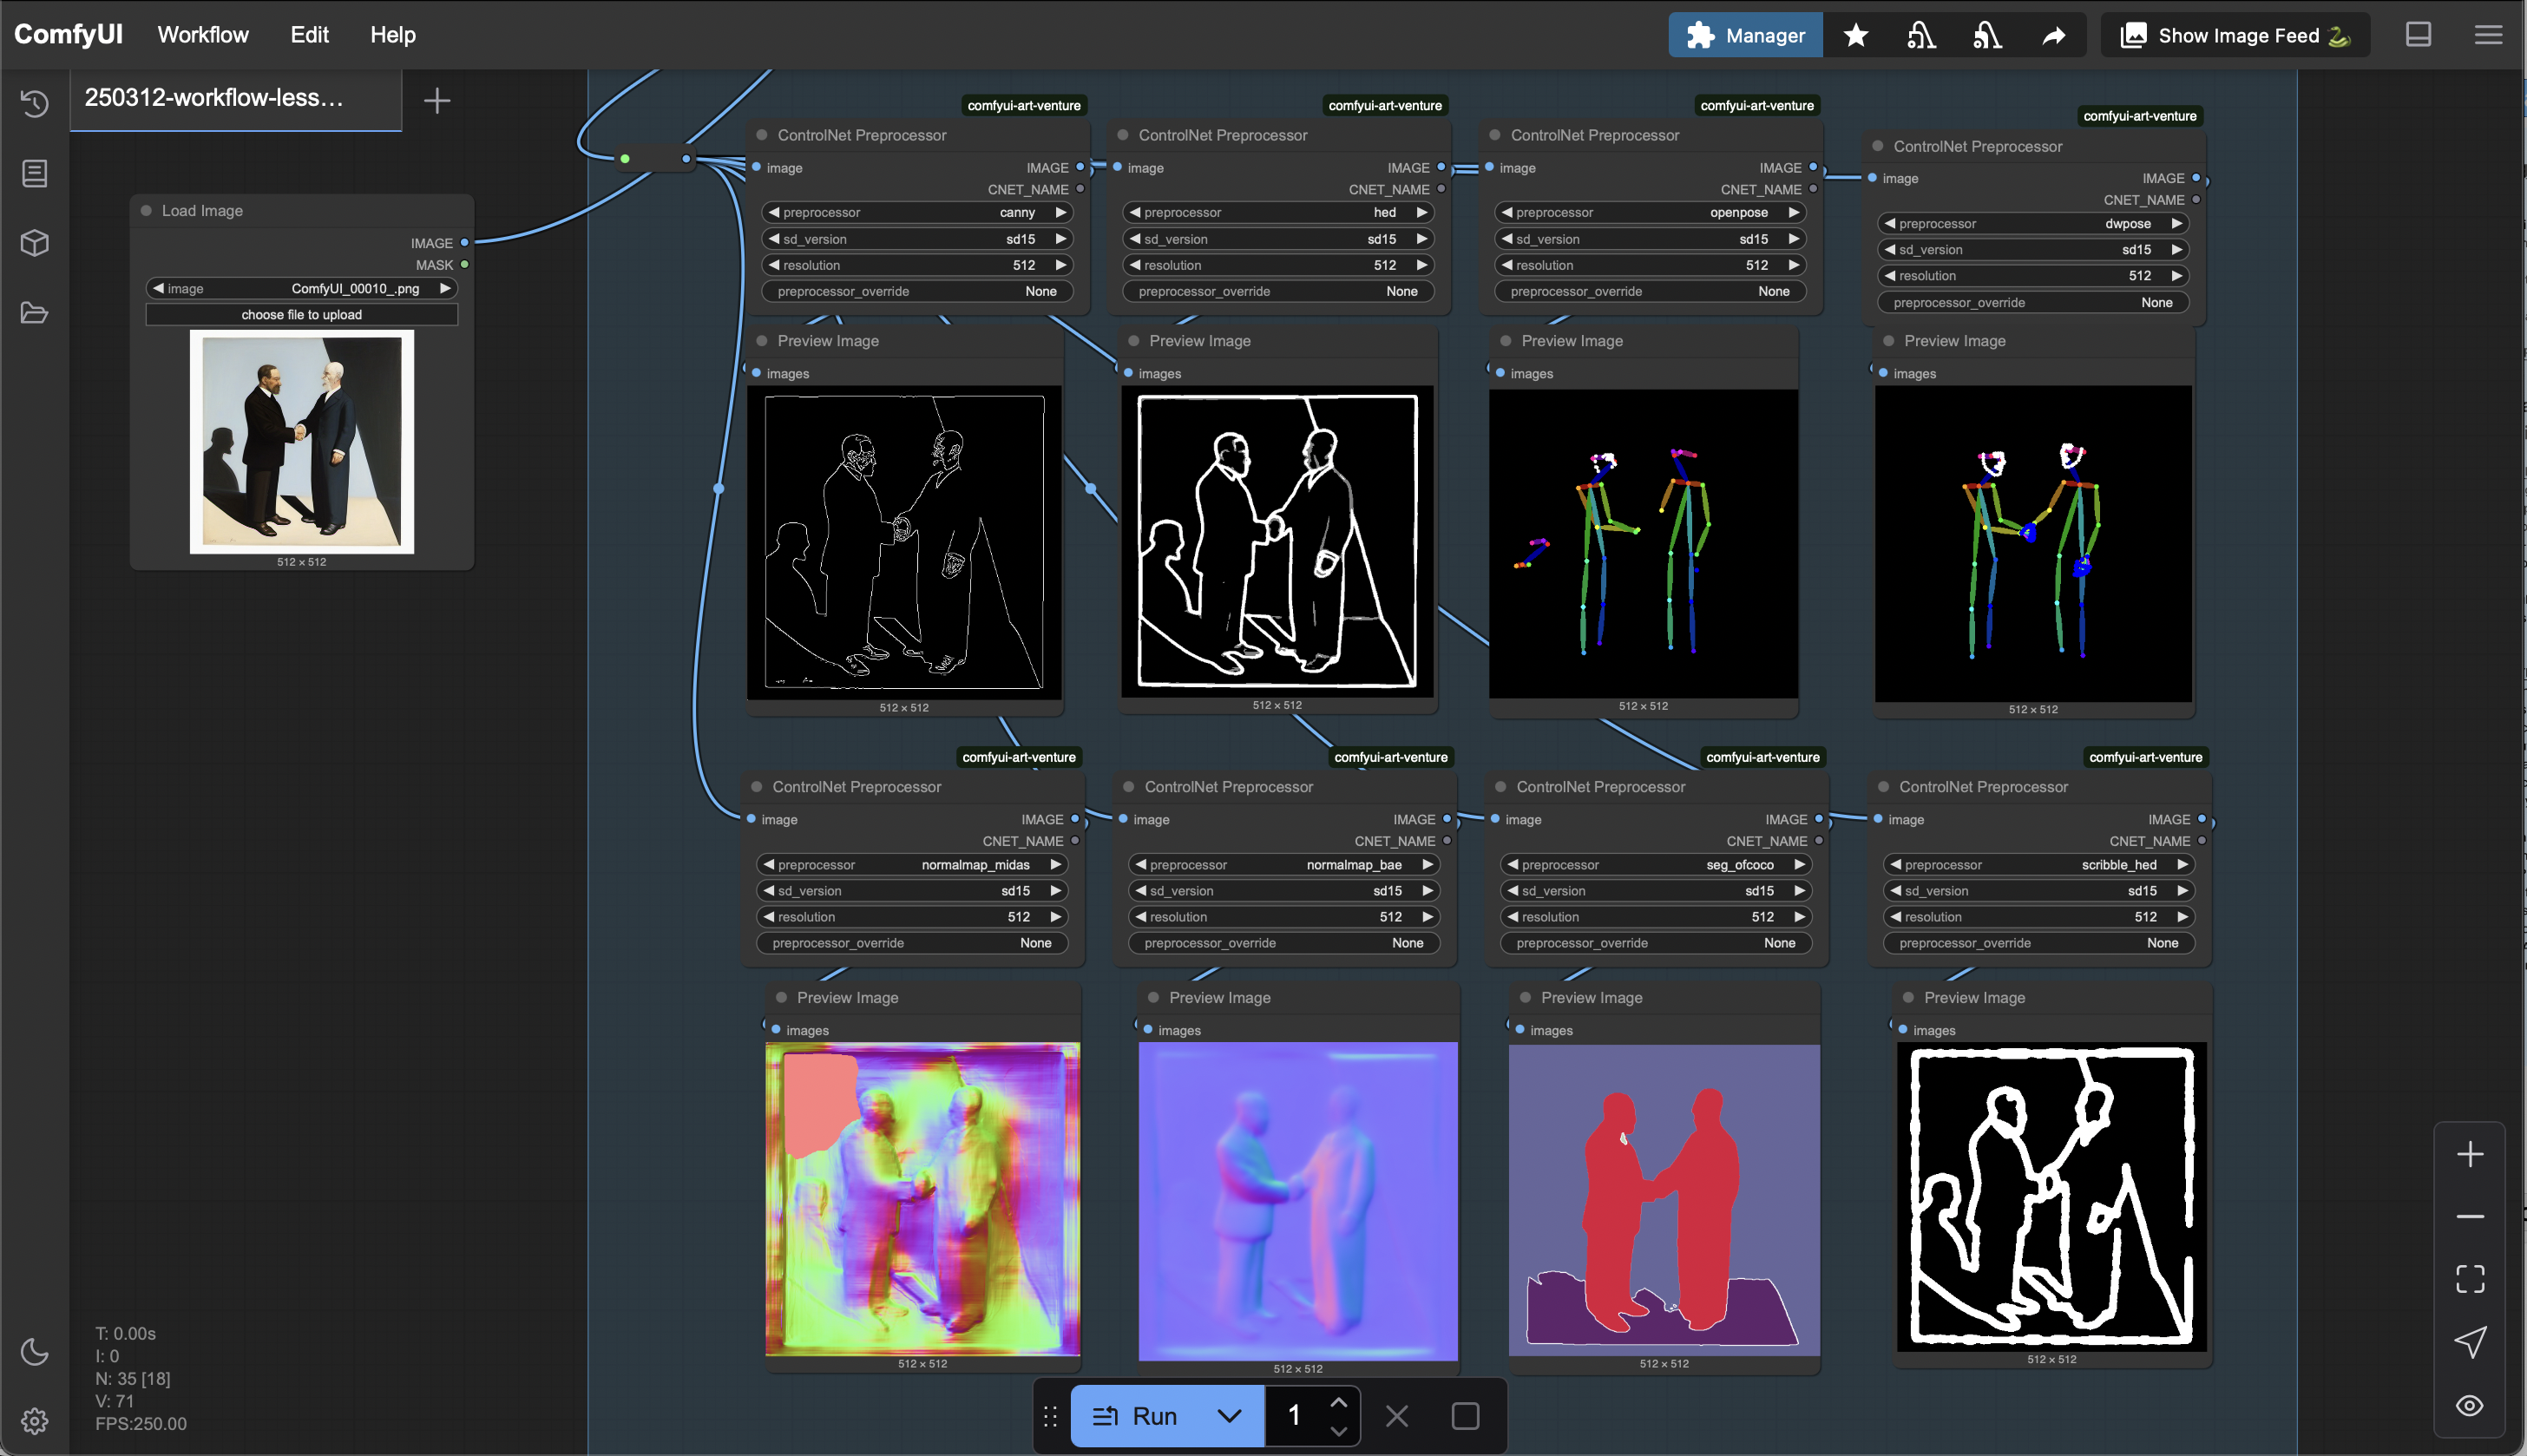
ControlNet
ControlNet allows for more precise control over img2img generation by conditioning the diffusion process on additional inputs like edge maps, depth maps, human poses, and more. Basically, it lets you "guide" the image generation more explicitly than with just a text prompt.
If you go to Workflow > Browse Templates, under the Tab ControlNet you will find a bunch of workflows to explore one functionality at a time.
The following tutorial with attached workflow to download lets you compare them in one file: https://openart.ai/workflows/oliviosarikas/lesson-9-controlnet---comfy-academy/eWSkFEeLjJ33zfCulBQs
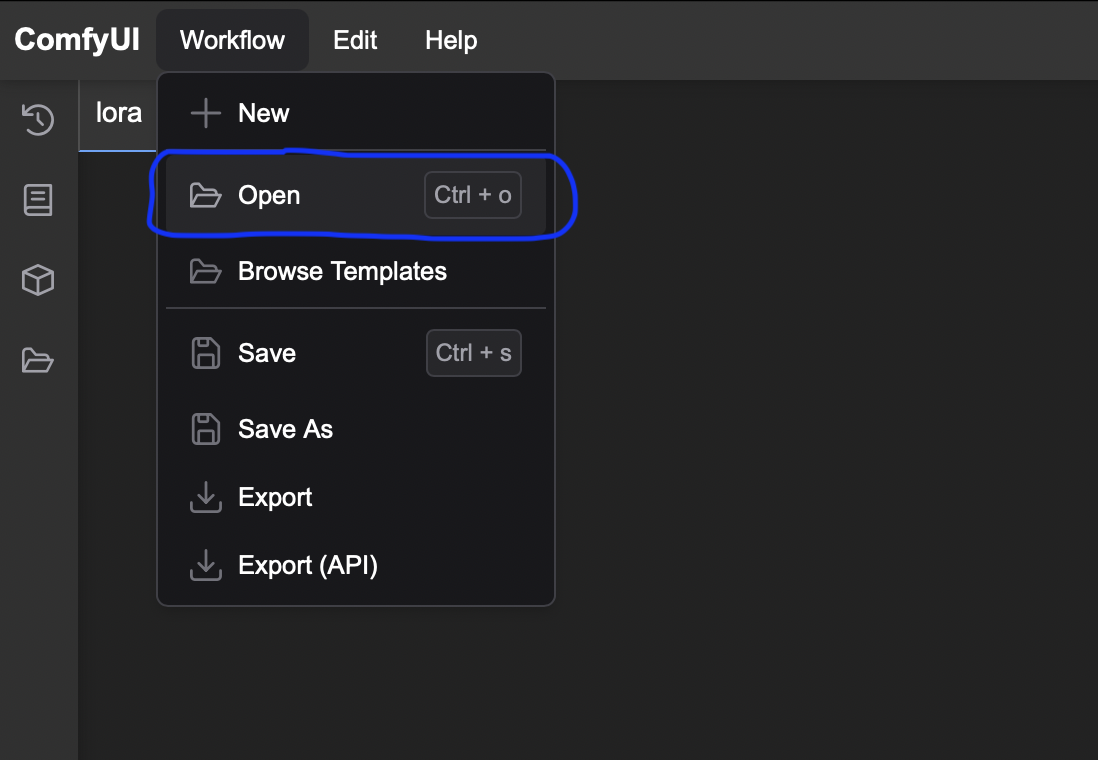
Download the workflow onto your local device, then go to Workflow > Open and select file.
Troubleshooting
When you open a workflow that was created by someone else, it might use nodes or models that you don't have installed. Here's a quick overview of how to deal with that.
Missing Node
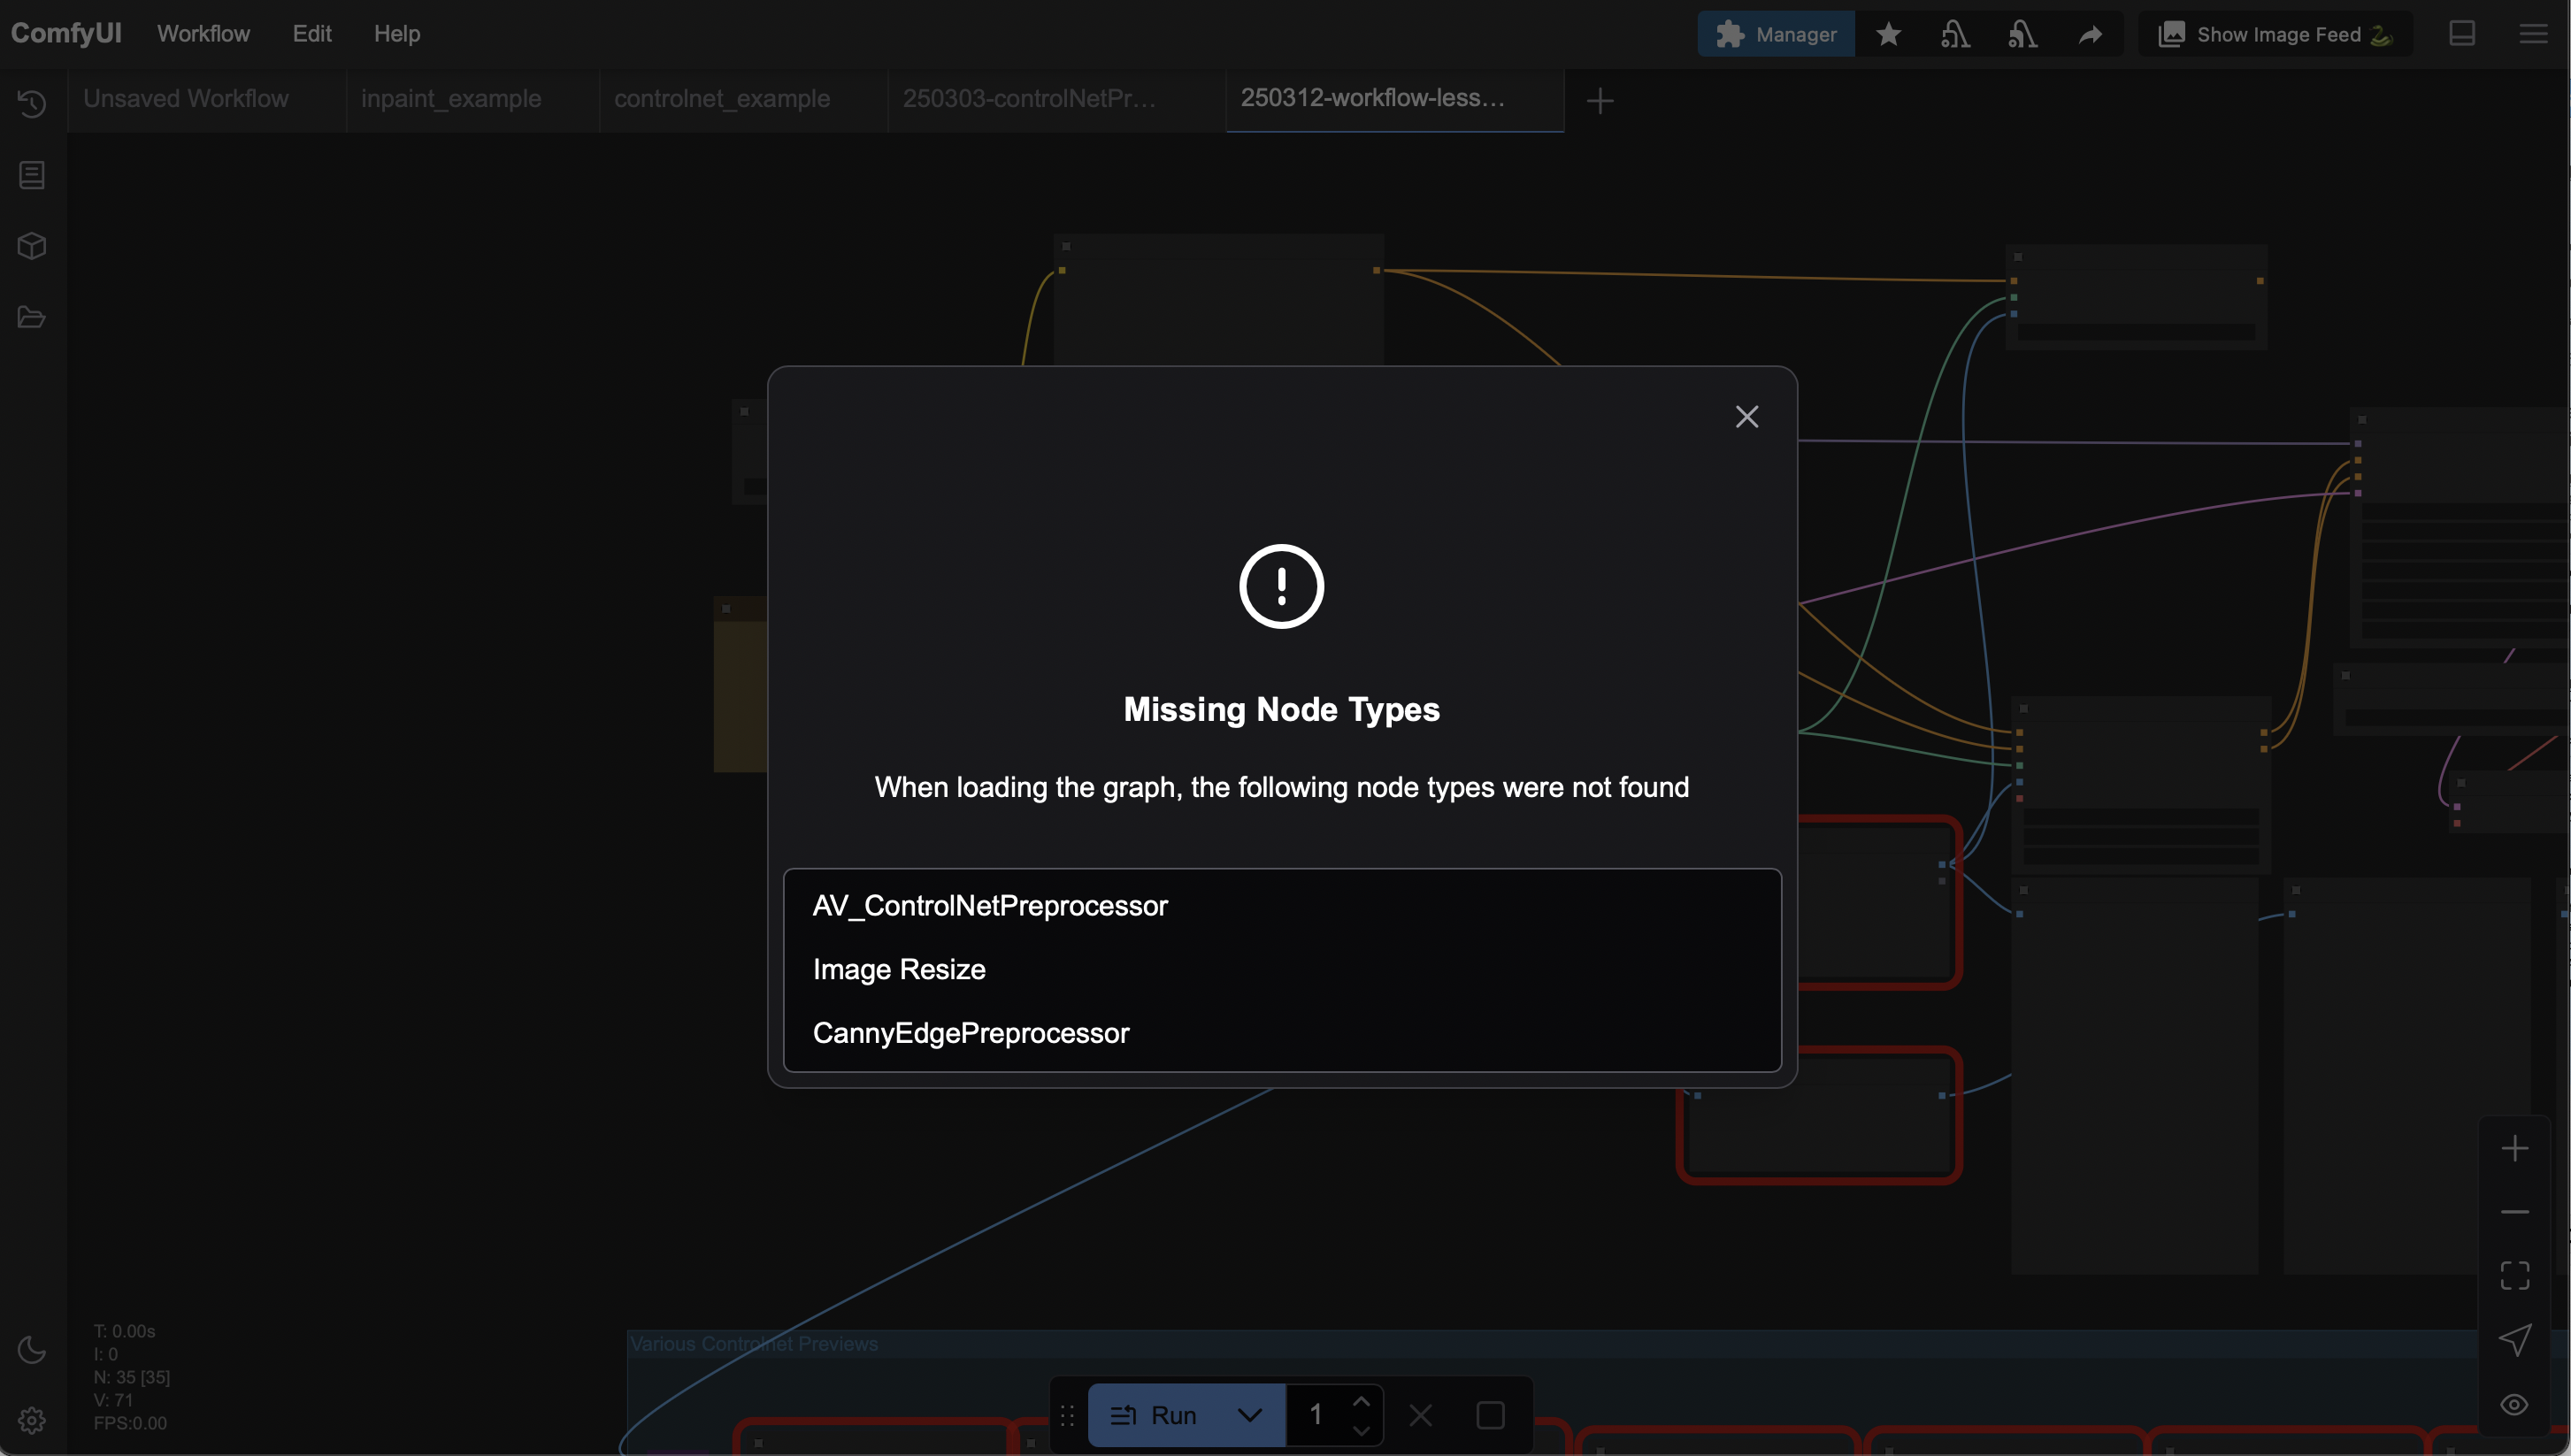
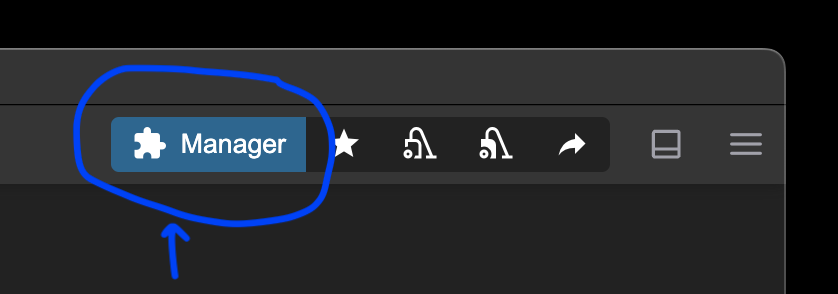
Close the Missing Node Type notification, open Manager.
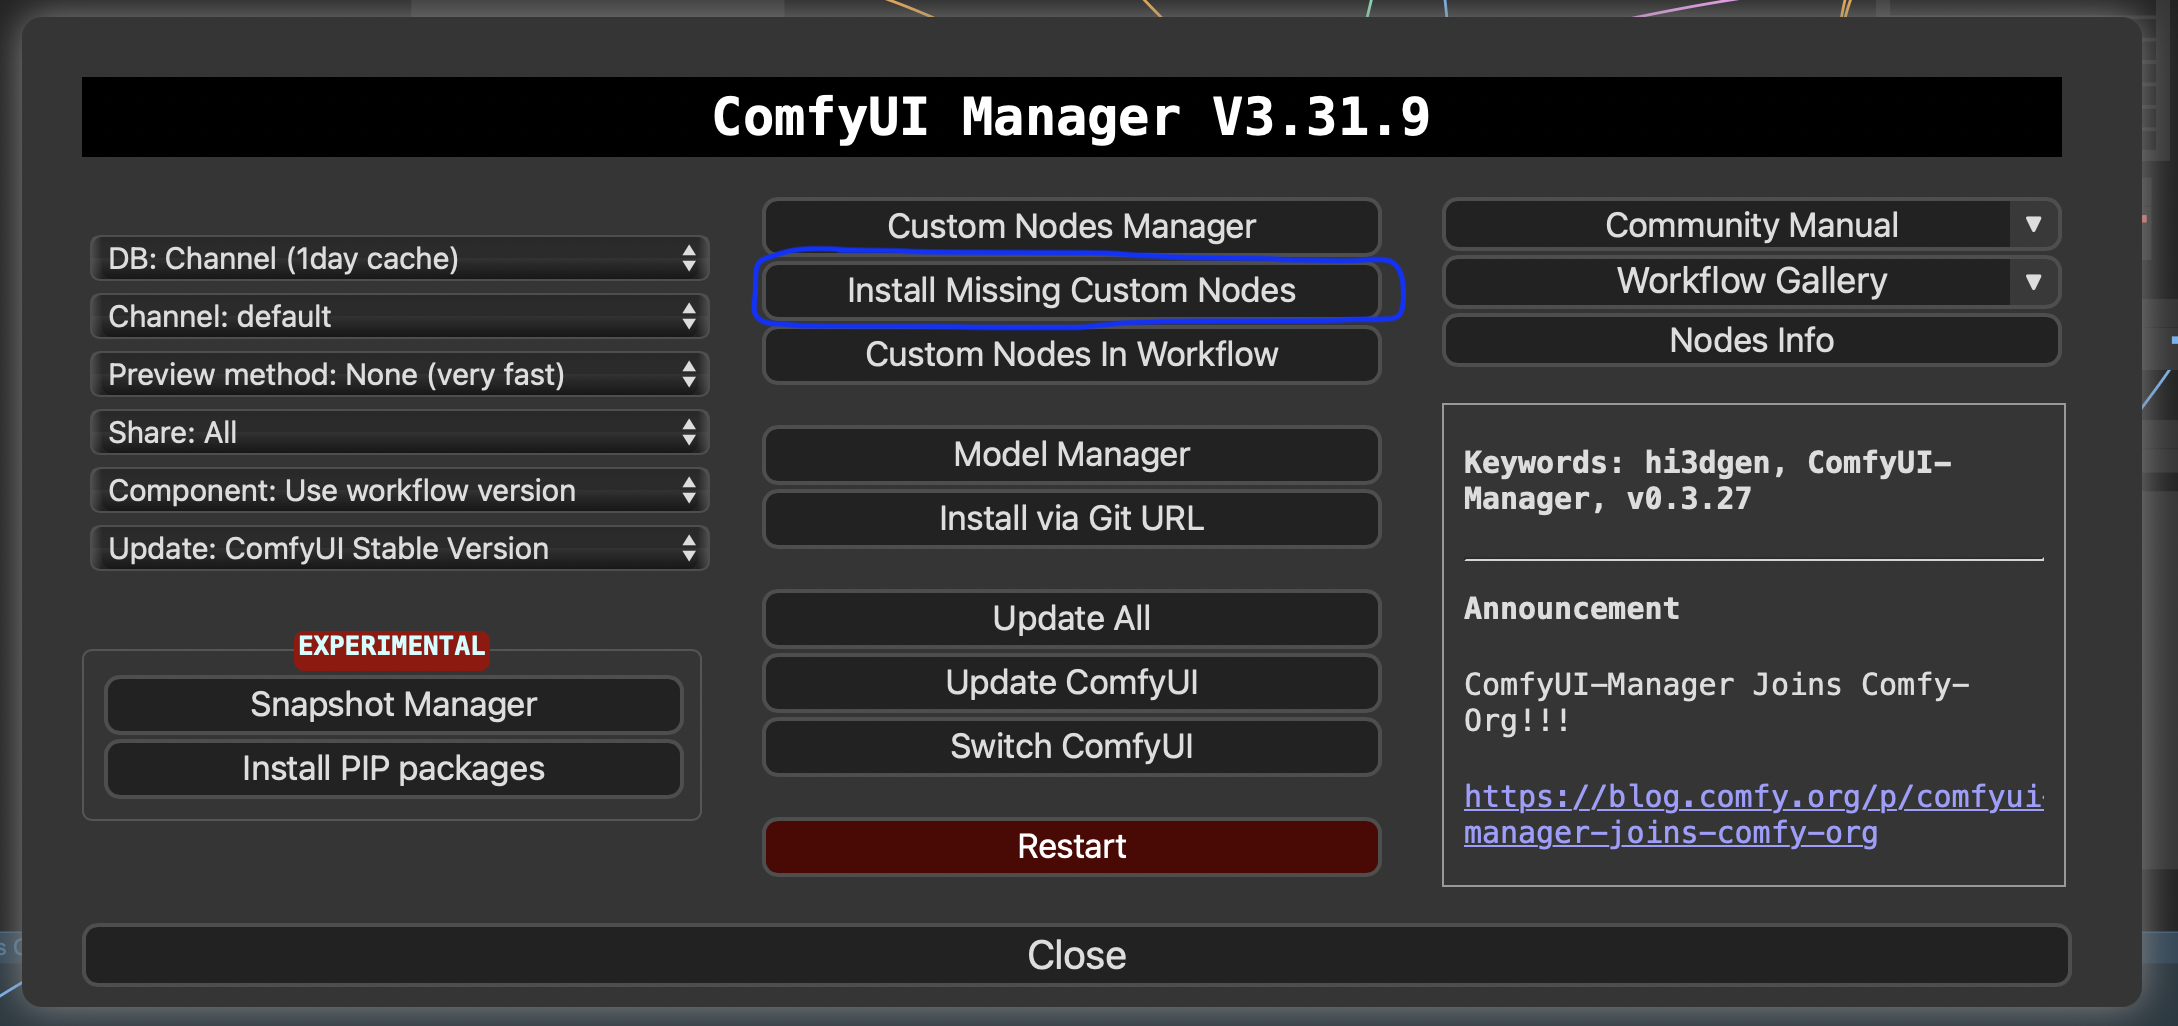
Go to Install Missing Custom Nodes
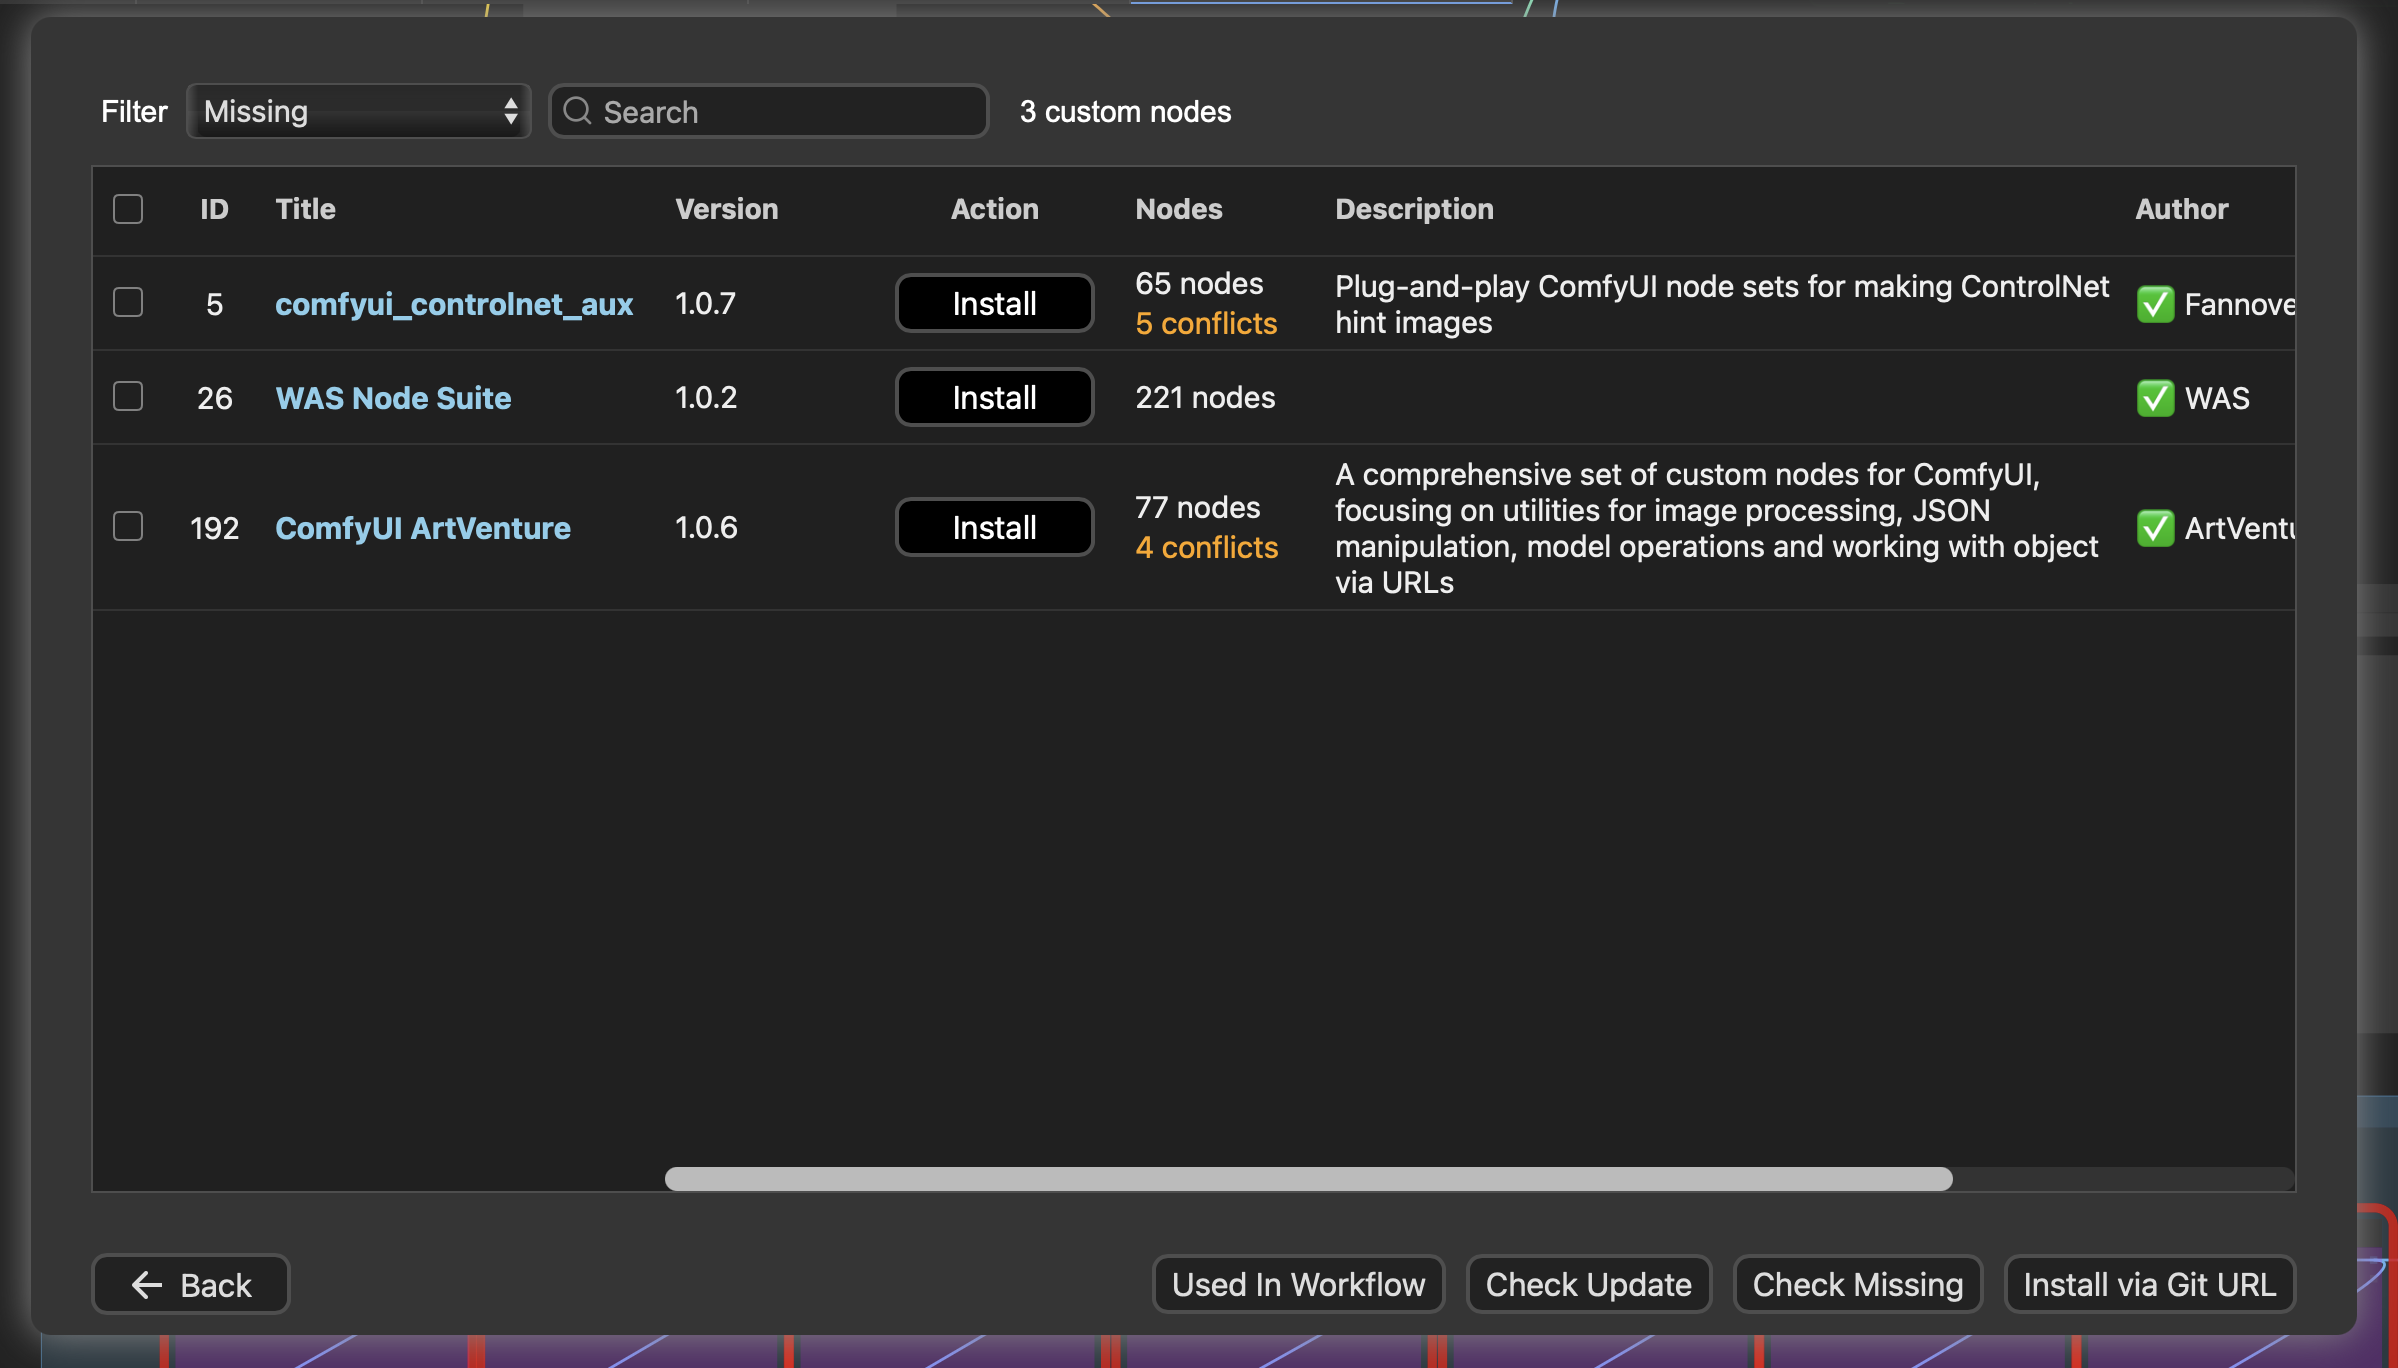
- Click
install. - When installation is done, a pop up window will ask you to refresh the page. Click
Refresh. - You can only install one at a time. If you have multiple nodes to install, go back to Manager after refreshing and repeat the process.
- Restart ComfyUI: Go back to Manager and press the red Restart Button.
Missing Models, missing Loras

Close the Missing Loras notification.*
*Don't click the Download Buttons. They will let you download the models onto your local device, where they're of little use if you are on the KITeGG server. Moreover you have already installed at least one model in the installation process. So here's what to do instead:
In the node Load Checkpoint you can select your Stable Diffusion Model. Just click on the stepper button and select one of your installed models.
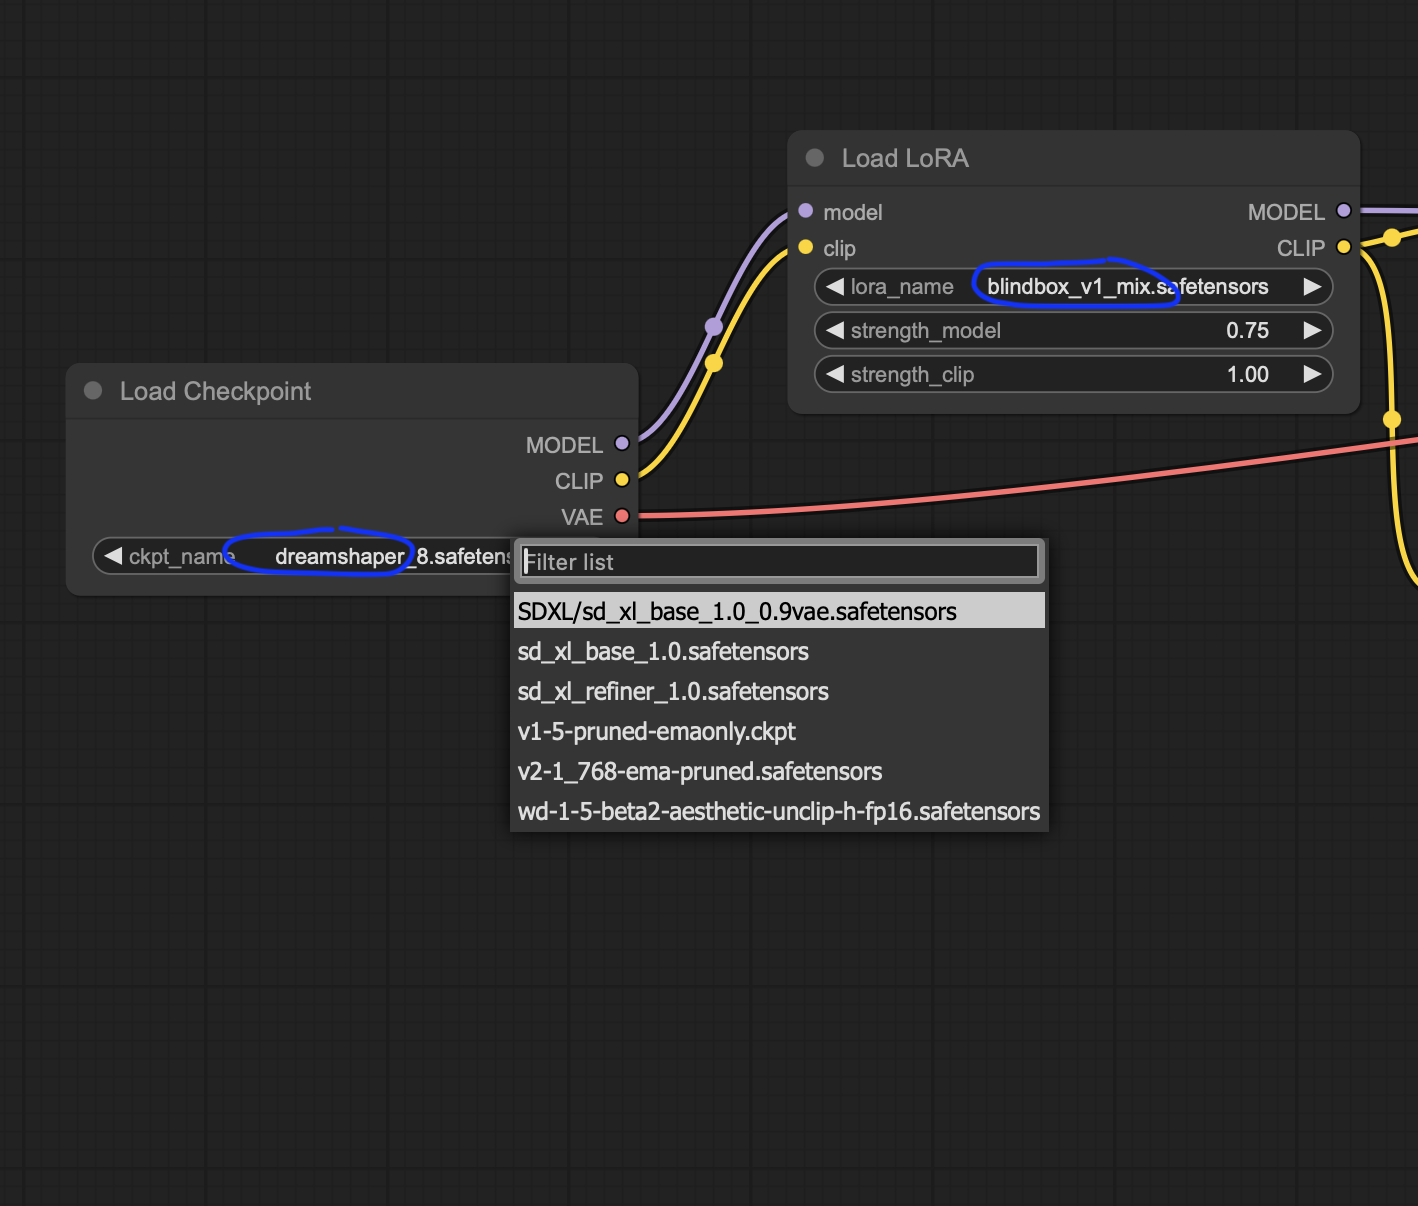
Same goes for missing Loras: In the node Load LoRA, click on the stepper button lora_name and select a Lora.
Add a Model
If you do want/need to add a Model or Lora, the easiest way is to do that in the Model Manager.
Other options are through the Jupiter Notebook in the installation process or by cloning a GitHub repository in Terminal.

Model Compatibility
This will not be an issue in the base workflow, however if you are using a Workflow that selects a Lora and/or a VAE, make sure that the Lora and VAE are compatible with your Stable Diffusion Model.
Model Versions are called v1-5, v2-1, SD_XL, ... usually the version is also part of the Loras' and VAEs' names.