Jupyter Hub
- Stable Diffusion
- custom environments
- Jupyter Notebooks
- downloading entire folders
- endowing file with right to execute
- Hidden Layers Workshop commands
- stable diffusion
- Adding a virtual environment in Jupyter notebook
- Deforum Stable Diffusion Animation parameters
- Stable Diffusion v2
Stable Diffusion
Stable diffusion webui by automatic1111 (with deforum installation)
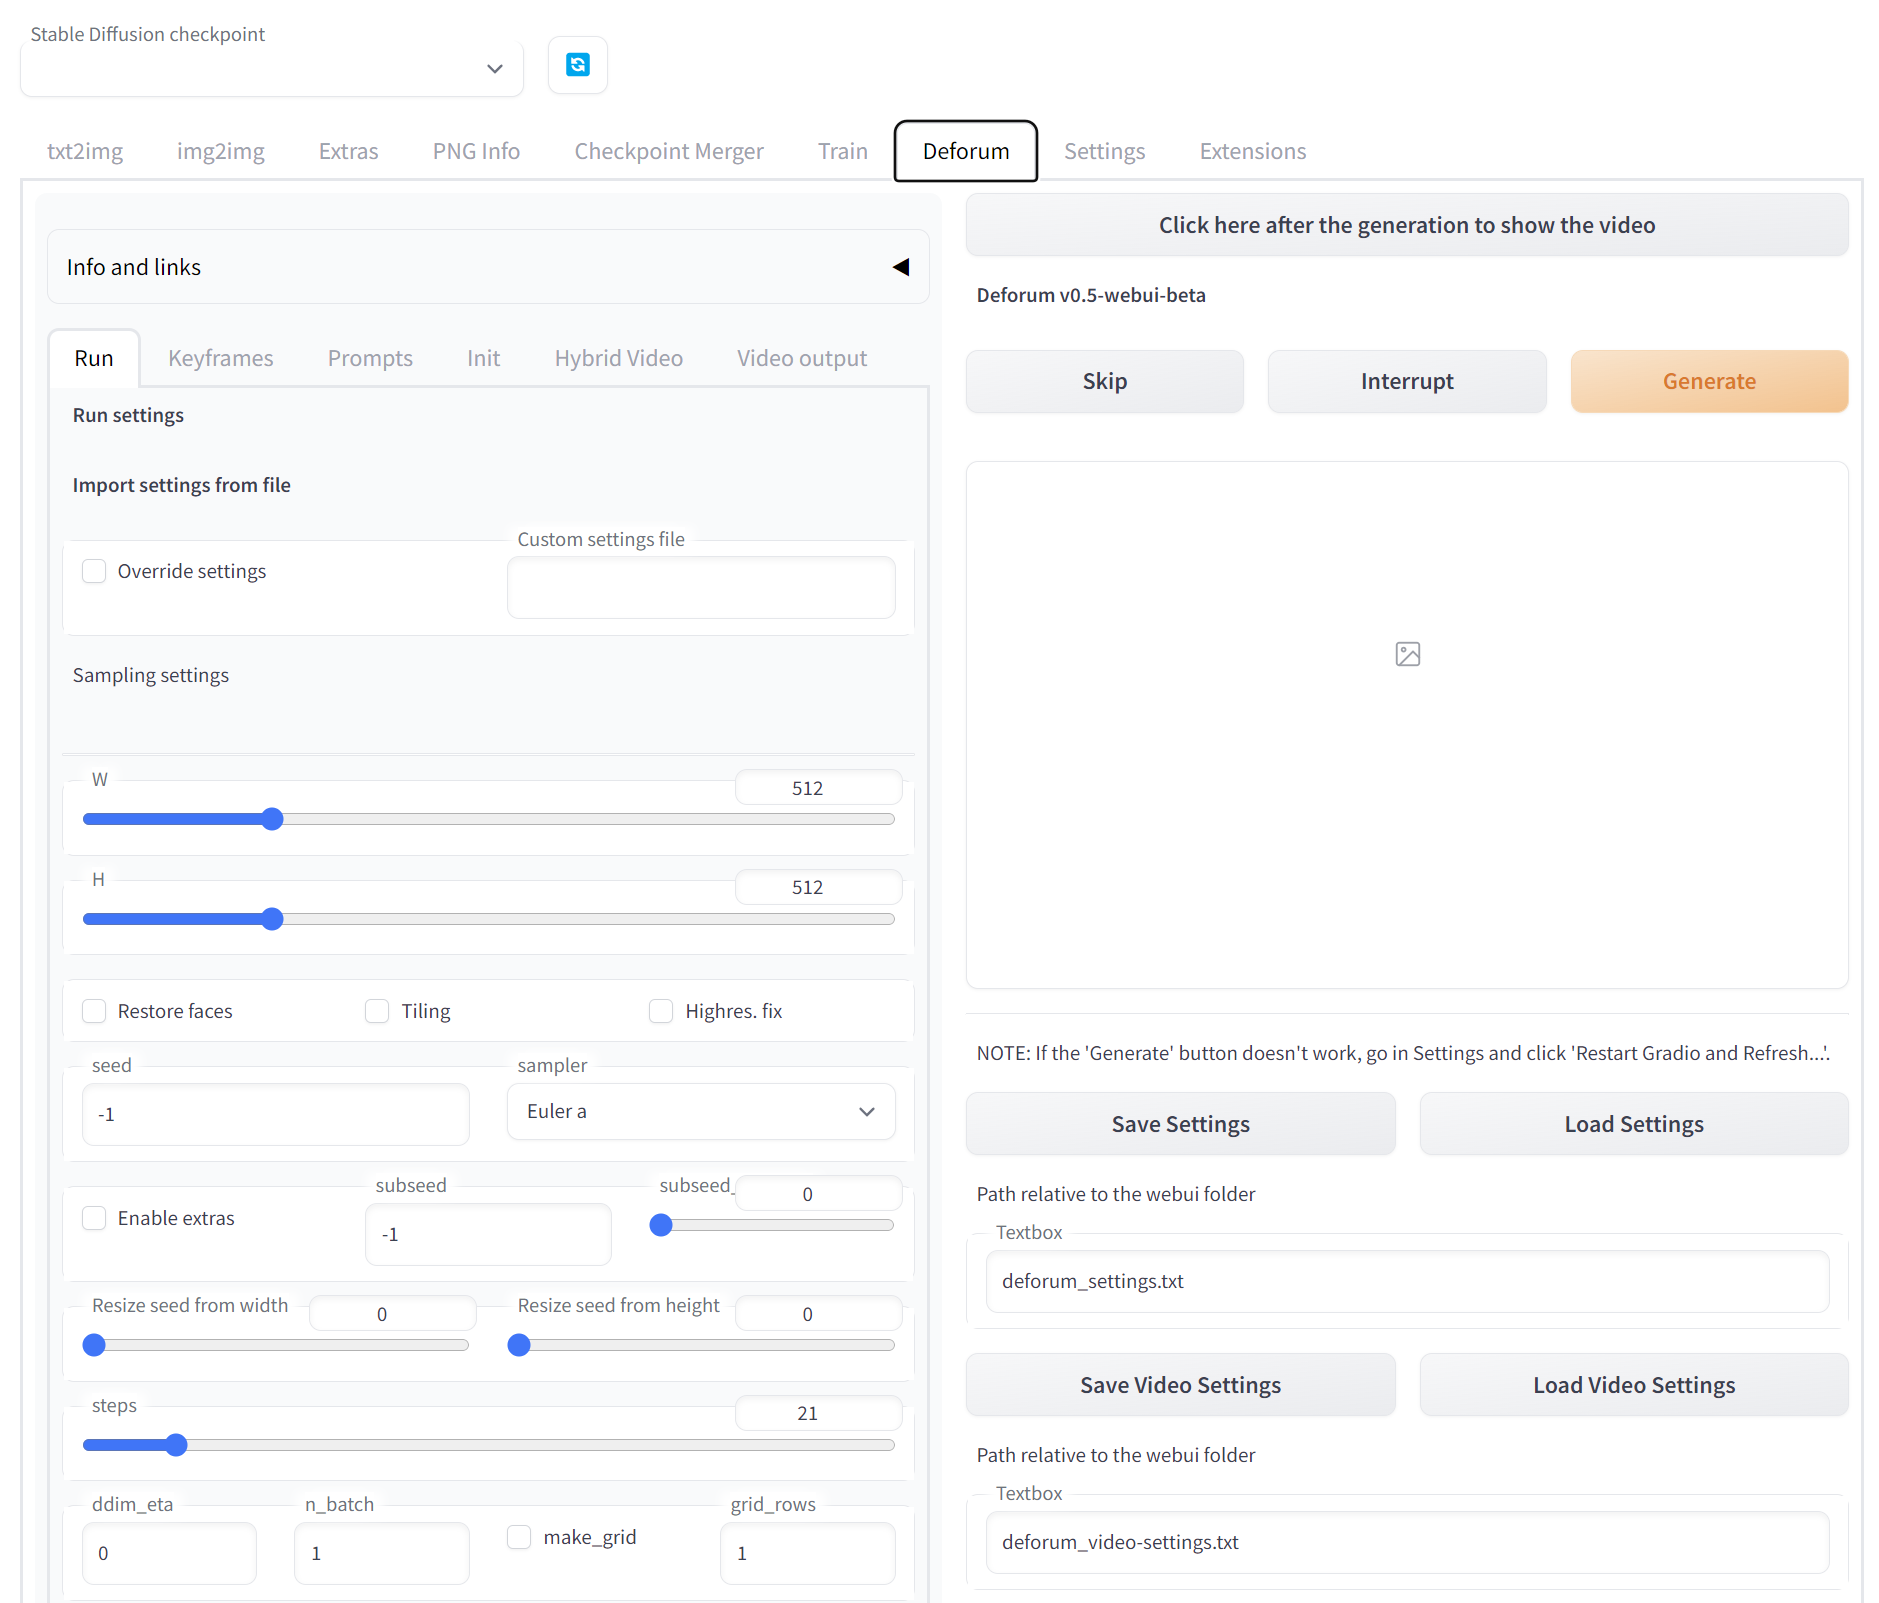
Stable Diffusion WebUI by Automatic1111
1. Open a Terminal
execute the following commands in terminal in this order:
git clone https://github.com/AUTOMATIC1111/stable-diffusion-webui.gitcd stable-diffusion-webui/models/Stable-diffusiondownload models
download stable-diffusion-v5 from KISD MODEL ZOO
wget --no-check-certificate --content-disposition https://th-koeln.sciebo.de/s/LwN49UHfYkVH2zE/download -O v1-5-pruned-emaonly.ckptdownload protogen-v4.3 from KISD MODEL ZOO
wget --no-check-certificate --content-disposition https://th-koeln.sciebo.de/s/2MTmmPTeuSu20MY/download -O ProtoGen_X3.4.ckptcd -install the deforum extension:
git clone https://github.com/deforum-art/deforum-for-automatic1111-webui/ extensions/deforumchmod +x webui.sh./webui.sh --sharecopy the public URL to your Browser - it looks like this:

Getting started at home
cd stable-diffusion-webui./webui.sh --share---------- Work in progress --------
Stable-diffusion 2 by Stability AI
configure and activate environment ldm (environment.yaml)
cd stablediffusionpython scripts/gradio/depth2img.py configs/stable-diffusion/v2-midas-inference.yaml ./models/512-depth-ema.ckpt stable diffusion lokal
"Ubuntu" Windows App oeffnen

conda umgebung aktivieren
conda activate ldmstable-diffusion ordner oeffnen
cd stable-diffusionstable-diffusion ordner oeffnen
python scripts/txt2img.py --prompt "a photograph of an astronaut riding a horse" --plmshttps://github.com/CompVis/stable-diffusion
Ergebnisse findest du unter: Linux/home/student/stable-diffusion/outputs
custom environments
Creating the environment
1. Open a new Terminal
2. in case the environment should be available permanently
conda config --add envs_dirs /home/jovyan/.conda_envs3. create environment with conda
conda create --name myenv4. initialize bash shell
conda init bash5. restart shell
source ~/.bashrc6. activate environment:
conda activate myenvActivating an environment
these steps need to be executed to activate an environment
1. initialize bash shell
conda init bash2. restart shell
source ~/.bashrc3. activate environment:
conda activate myenvExporting environment to custom Kernel image
First, activate your virtual environment *previous step* and install ipykernel:
pip install --user ipykernel
We need to manually add the kernel if we want to have the virtual environment in the Jupyter Notebook. That is why we need to add it by running this code.
python -m ipykernel install --user --name=myenv
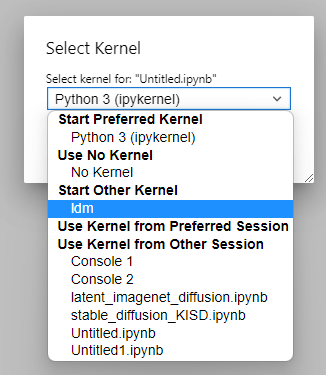
when creating a new notebook, you can choose your new kernel image
If you have finished with the virtual environment and did not need it anymore, you could remove it using this command:
jupyter kernelspec uninstall myenv
Installing packages in user space
So that pip installs don't get lost after restart
pip install --user package_nameJupyter Notebooks
custom environments
open new Terminal
conda create --name myenvinitialize bash shell
conda init bashrestart shell
source ~/.bashrcthen:
conda activate myenvdownloading entire folders
if you want to download an entire folder you need to zip it first:
zip -r example.zip PATH_TO_THE_FOLDER_YOU_WANT_TO_DOWNLOAD
endowing file with right to execute
chmod +x the_file_nameHidden Layers Workshop commands
Participants' credentials
| Isabela Dimarco | ws_01 |
| Hartmut Bohnacker | ws_02 |
| Maika Dieterich | ws_03 |
| Julius Walsch | ws_04 |
| Alexander Bauer | ws_05 |
| Francesco Scheffczyk | ws_06 |
| Jada Jui Yu Hung | ws_07 |
| Inca Jentsch | ws_08 |
| Polina Toumey | ws_09 |
| ws_10 |
Password:
CMD Commands for JupyterHub
endow bash file right to execute
chmod +x install.shinstallations...
./install.shinitialize bash shell
conda init bashrestart shell
source ~/.bashrcthen:
conda activate myenvdownloading an entire folder from Jupyter Hub
zip -r example.zip original_folderstable diffusion
Adding a virtual environment in Jupyter notebook
First, activate your virtual environment (shell) and run this:
pip install --user ipykernelWe need to manually add the kernel if we want to have the virtual environment in the Jupyter Notebook. That is why we need to add it by running this code.
python -m ipykernel install --user --name=myenv
when creating a new notebook, you can choose your new kernel image
If you have finished with the virtual environment and did not need it anymore, you could remove it using this code.
jupyter kernelspec uninstall myenvDeforum Stable Diffusion Animation parameters
Executing run.py with an animation settings file
if you want to animate you appennd the flag '--enable_animation_mode' to the run.py command. The '--settings flag' should point to a file that has the structure of the animation template that can be found in:
/home/jovyan/DeforumStableDiffusionLocal/examples/runSettings_Animation.txt
or
./examples/runSettings_Animation.txt
in our example the command could be this:
python run.py --settings experiments/YOUR_NAME/runSettings_Animation.txt --enable_animation_modeConfiguration of the settings file
"animation_mode":
Interpolation
Interpolationthe animation prompts will be used. stable diffusion will interpolate between these prompts. Interpolation can be used with an "init_image " . optional 2D motion parameters will apply
2D Motion (optional)
-
angle, 2D operator to rotate canvas clockwise/anticlockwise in degrees per frame
-
zoom, 2D operator that scales the canvas size, multiplicatively [static = 1.0]
-
translation_x, 2D & 3D operator to move canvas left/right in pixels per frame
-
translation_y, 2D & 3D operator to move canvas up/down in pixels per frame
- flip_2D_perspective, enables 2D mode functions to simulate “faux” 3D movement
-
perspective_flip_theta, the “roll” effect angle
-
perspective_flip_phi, the “tilt” effect angle
-
perspective_flip_gamma, the “pan” effect angle
-
perspective_flip_fv, the 2D vanishing point of perspective (rec’d range 30-160)
-
noise_schedule, amount of graininess to add per frame for diffusion diversity
-
strength_schedule, amount of presence of previous frame to influence next frame, also controls steps in the following formula [steps - (strength_schedule * steps)] (more details under: “steps”)
-
contrast_schedule, adjusts the overall contrast per frame [default neutral at 1.0]
init_image (optional)
"init_image":" PATH TO INIT IMAGE HERE! ",
Video Input
Video InputWhen selected, will ignore all motion parameters and attempt to reference a video loaded into the runtime, specified by the video_init_path. Video Input mode will ignore the “none mode” prompts and refer to the prompts that are scheduled with a frame number before them. “Max_frames” is ignored during video_input mode, and instead, follows the number of frames pulled from the video’s length. The notebook will populate images from the video into the selected drive as a string of references to be impacted. The number of frames to be pulled from the video is based on “extract_nth_frame”. Default of 1 will extract every single frame of the video. A value of 2 will skip every other frame. Values of 3 and higher will effectively skip between those frames yielding a shorter batch of images. Currently, video_input mode will ignore all other coherence parameters, and only affect each frame uniquely. Resume_from_timestring is NOT available with Video_Input mode.
additional video input parameters
-
video_init_path, the directory at which your video file is located for Video INput mode only.
-
extract_nth_frame, during the run sequence, only frames specified by this value will be extracted, saved, and diffused upon. A value of 1 indicates that every frame is to be accounted for. Values of 2 will use every other frame for the sequence. Higher values will skip that number of frames respectively.
-
overwrite_extracted_frames, when enabled, will re-extract video frames each run.
When using video_input mode, the run will be instructed to write video frames to the drive. If you’ve already populated the frames needed, uncheck this box to skip past redundant extraction, and immediately start the render. If you have not extracted frames, you must run at least once with this box checked to write the necessary frames.
-
use_video_mask, video_input mode only, enables the extraction and use of a separate video file intended for use as a mask. White areas of the extracted video frames will not be affected by diffusion, while black areas will be fully effected. Lighter/darker areas are affected dynamically.
-
video_mask_path, the directory in which your mask video is located.
3D
3DWhen selected will ignore the “none mode” prompts and refer to the prompts that are scheduled with a frame number before them. 3D mode will attempt to string the images produced in a sequence of coherent outputs. The number of output images to be created is defined by “max_frames”. The motion operators that control 3D mode are as follows:“Border, translation_x, translation_y, rotation_3d_x, rotation_3d_y, rotation_3d_z, noise_schedule, contrast_schedule, color_coherence, diffusion_cadence, 3D depth warping, midas_weight, fov, padding_mode, sampling_mode, and save_depth_map. Resume_from_timestring is available during 3D mode.
3D Motion parameters
-
translation_x, 2D & 3D operator to move canvas left/right in pixels per frame
-
translation_y, 2D & 3D operator to move canvas up/down in pixels per frame
-
translation_z, 3D operator to move canvas towards/away from view [speed set by FOV]
-
rotation_x, 3D operator to tilt canvas up/down in degrees per frame
-
rotation_y, 3D operator to pan canvas left/right in degrees per frame
-
rotation_z, 3D operator to roll canvas clockwise/anticlockwise
3D depht
-
use_depth_warping, enables instructions to warp an image dynamically in 3D mode only.
-
midas_weight, sets a midpoint at which a depthmap is to be drawn: range [-1 to +1]
-
fov, adjusts the scale at which a canvas is moved in 3D by the translation_z value
FOV (field of view/vision) in deforum, will give specific instructions as to how the translation_z value affects the canvas. Range is -180 to +180. The value follows the inverse square law of a curve in such a way that 0 FOV is undefined and will produce a blank image output. A FOV of 180 will flatten and place the canvas plane in line with the view, causing no motion in the Z direction. Negative values of FOV will cause the translation_z instructions to invert, moving in an opposite direction to the Z plane, while retaining other normal functions.A value of 30 fov is default whereas a value of 100 would cause transition in the Z direction to be more smooth and slow. Each type of art and context will benefit differently from different FOV values. (ex. “Still-life photo of an apple” will react differently than “A large room with plants”)
FOV also lends instruction as to how a midas depth map is interpreted. The depth map (a greyscale image) will have its range of pixel values stretched or compressed in accordance with the FOV in such a fashion that the illusion of 3D is more pronounced at lower FOV values, and more shallow at values closer to 180. At full FOV of 180, no depth is perceived, as the midas depth map has been compressed to a single value range.
-
padding_mode, instructs the handling of pixels outside the field of view as they come into the scene. ‘Border” will attempt to use the edges of the canvas as the pixels to be drawn. “Reflection” will attempt to approximate the image and tile/repeat pixels, whereas “Zeros” will not add any new pixel information.
-
sampling_mode, choose from Bicubis, Bilinear or Nearest modes.
In image processing, bicubic interpolation is often chosen over bilinear or nearest-neighbor interpolation in image resampling, when speed is not an issue. In contrast to bilinear interpolation, which only takes 4 pixels (2×2) into account, bicubic interpolation considers 16 pixels (4×4). Images resampled with bicubic interpolation are smoother and have fewer interpolation artifacts.
-
save_depth_map, will output a greyscale depth map image alongside the output images.
2D
2Dwill ignore the “none mode” prompts and refer to the prompts that are scheduled with a frame number before them. 2D mode will attempt to string the images produced in a sequence of coherent outputs. The number of output images to be created is defined by “max_frames”. The motion operators that control 2D mode are as follows:
“Border, angle, zoom, translation_x, translation_y, noise_schedule, contrast_schedule, color_coherence, diffusion_cadence, and save depth maps”. Other animation parameters have no effect during 2D mode. Resume_from_timestring is available during 2D mode.
2D Motion
-
angle, 2D operator to rotate canvas clockwise/anticlockwise in degrees per frame
-
zoom, 2D operator that scales the canvas size, multiplicatively [static = 1.0]
-
translation_x, 2D & 3D operator to move canvas left/right in pixels per frame
-
translation_y, 2D & 3D operator to move canvas up/down in pixels per frame
- flip_2D_perspective, enables 2D mode functions to simulate “faux” 3D movement
-
perspective_flip_theta, the “roll” effect angle
-
perspective_flip_phi, the “tilt” effect angle
-
perspective_flip_gamma, the “pan” effect angle
-
perspective_flip_fv, the 2D vanishing point of perspective (rec’d range 30-160)
-
noise_schedule, amount of graininess to add per frame for diffusion diversity
-
strength_schedule, amount of presence of previous frame to influence next frame, also controls steps in the following formula [steps - (strength_schedule * steps)] (more details under: “steps”)
-
contrast_schedule, adjusts the overall contrast per frame [default neutral at 1.0]
Coherence
"seed_behavior":
-
iter = incremental change (ex 77, 78, 79 ,80, 81, 82, 83…)
-
fixed = no change in seed (ex 33, 33, 33, 33, 33, 33…)
-
random = random seed (ex 472, 12, 927812, 8001, 724…)
Note: seed -1 will choose a random starting point, following the seed behavior thereafter
Troubleshoot: a “fixed” seed in 2D/3D mode will overbloom your output. Switch to “iter”
Setting seed behaviour to fixed is very important for consistency - if set to 'fixed', the same seed will be used for all the frames.
-
color_coherence, select between NONE, LAB, HSV, RGB
-
LAB: Perceptual Lightness* A * B axis color balance (search “cielab”)
-
HSV: Hue Saturation & Value color balance.
-
RGB: Red Green & Blue color balance.
The color coherence will attempt to sample the overall pixel color information, and trend those values analyzed in the 0th frame, to be applied to future frames. LAB is a more linear approach to mimic human perception of color space - a good default setting for most users.
HSV is a good method for balancing presence of vibrant colors, but may produce unrealistic results - (ie.blue apples) RGB is good for enforcing unbiased amounts of color in each red, green and blue channel - some images may yield colorized artifacts if sampling is too low.
-
diffusion_cadence, controls the frequency of frames to be affected by diffusion [1-8]
The diffusion cadence will attempt to follow the 2D or 3D schedule of movement as per specified in the motion parameters, while enforcing diffusion on the frames specified. The default setting of 1 will cause every frame to receive diffusion in the sequence of image outputs. A setting of 2 will only diffuse on every other frame, yet motion will still be in effect. The output of images during the cadence sequence will be automatically blended, additively and saved to the specified drive. This may improve the illusion of coherence in some workflows as the ontent and context of an image will not change or diffuse during frames that were skipped. Higher values of 4-8 cadence will skip over a larger amount of frames and only diffuse the “Nth” frame as set by the diffusion_cadence value. This may produce more continuity in an animation, at the cost of little opportunity to add more diffused content. In extreme examples, motion within a frame will fail to produce diverse prompt context, and the space will be filled with lines or approximations of content - resulting in unexpected animation patterns and artifacts. Video Input & Interpolation modes are not affected by diffusion_cadence.
Downloading an image sequence
if you want to download an entire folder you need to zip it first:
zip -r example.zip PATH_TO_THE_FOLDER_YOU_WANT_TO_DOWNLOAD
I
Stable Diffusion v2
Installing stable diffusion v2
important
Xformers
export CUDA_HOME=/usr/local/cuda