Unity
- Random walker
- Prefab + Simple Spawn
- Adding functionality to classes while adhering to their anatomy
- Anatomy of Unity C# Scripts
- Detecting Collisions
- [Exercise ] asset management and the Unity-Blender pipeline
- Creature with hinge joints
- Unity ML Agents
Random walker
We will create a first GameObject and give it the functionality to randomly change it's position within a predefined range.
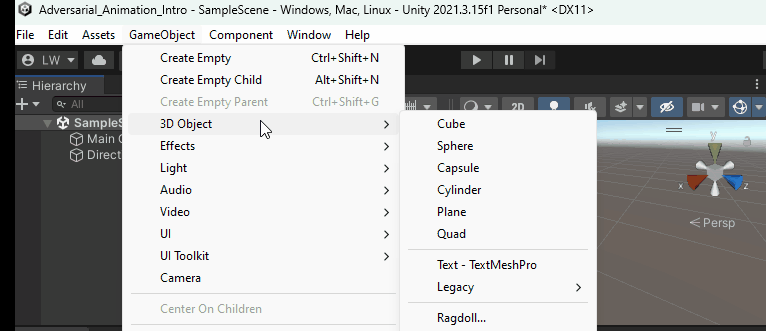
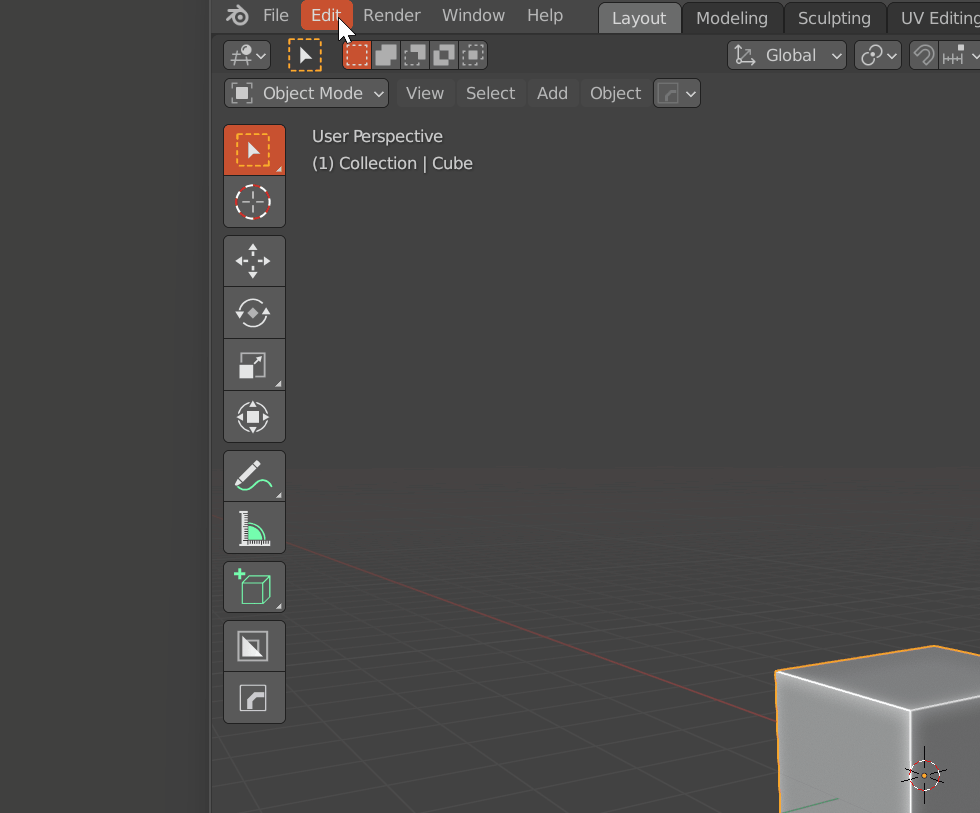
Create a GameObject
go to File -> GameObject -> cube to create your first GameObject
a handy definition for GameObject: A game object is the base class for all entities in unity
Create a Material for our GameObject
go to Assets -> create -> Material or In the Assets window leftClick -> create -> Material
rename it to "green"
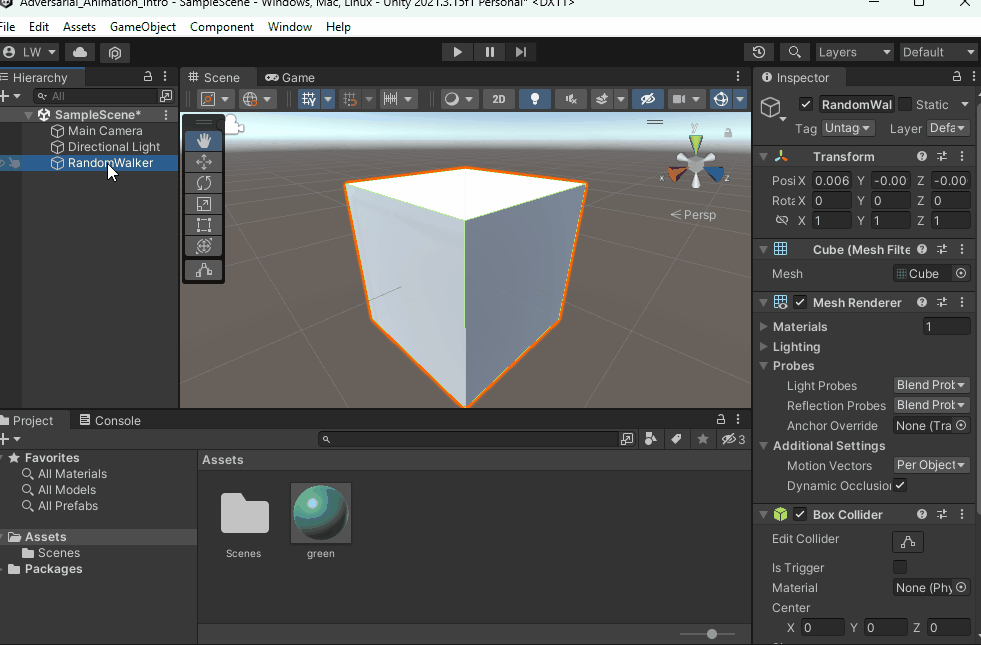
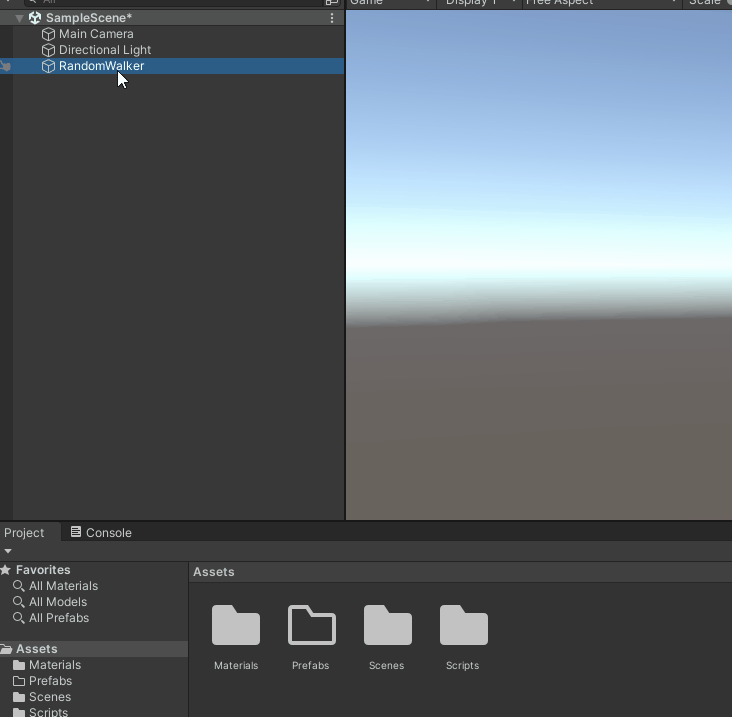
Assign the Material to the RandomWalker GameObject
click on the RandomWalker GameObject in the Scene view or the Hierarchy
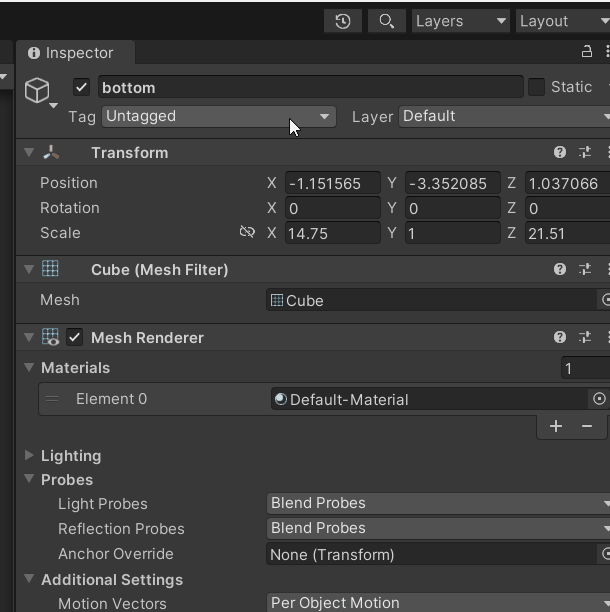
on the left, you will see now the Inspector window showing the GameObjects' properties!
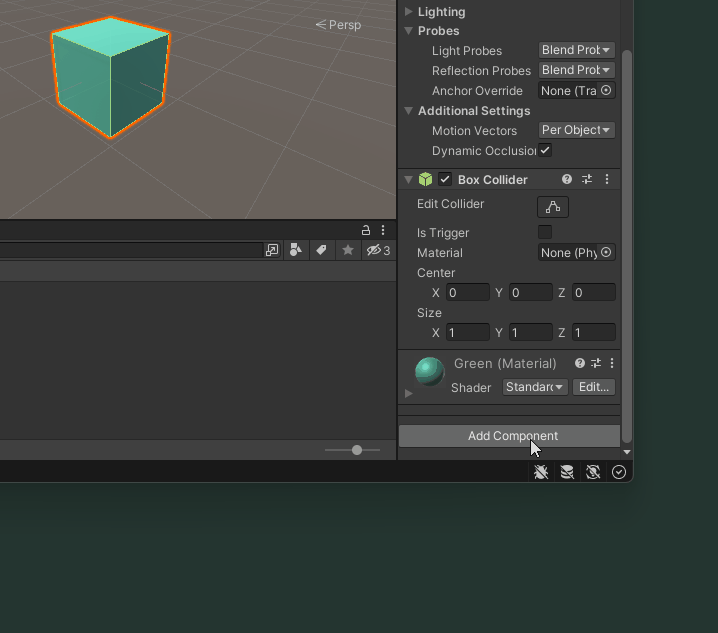
in the MeshRenderer component under Materials you will find the current material(s) assigned.
assign the material you've just created.
Create a Folder in the Assets Window and call it "Materials"
Drag the newly created Material 'green' into the newly created folder "Materials"
Attach a C# script to your GameObject
In the Inspector (right pane on default) scroll down and click 'Add Component'
Type the name of your new Script in this case "RandomWalker' and press the enter key.
In the Assets Window you'll see the newly created Script.
Create a Folder in the Assets Window and call it "Scripts"
Drag the Script "RandomWalker" into the newly created Folder called Scripts
Edit the C# script to add random walk functionality to the RandomWalker class
When the script is created, it normally opens immediately in the IDE that is associated with Unity
in our case, that is Visual Studio Code. You can the associated editor under File -> Preferences -> External Tools
If the editor does not open, you can click with your mouse on the script in the Assets window, generally you can find all Scripts in the folder "Scripts."
using System.Collections;
using System.Collections.Generic;
using UnityEngine;
public class RandomWalker : MonoBehaviour
{
public float speed = 2f; // speed of movement
public float range = 3f; // range of movement
private Vector3 targetPosition;
void Start()
{
targetPosition = transform.position + Random.insideUnitSphere * range;
}
void Update()
{
// move towards target position
transform.position = Vector3.MoveTowards(transform.position, targetPosition, speed * Time.deltaTime);
// if target position is reached, set a new random target position
if (Vector3.Distance(transform.position, targetPosition) < 0.1f)
{
targetPosition = transform.position + Random.insideUnitSphere * range;
}
}
}
Prefab + Simple Spawn

we will setup a simple spawn location, from where GameObjects - instances of a Prefab will be instantiated - 'spawned' at a predefined rate.
Creating Prefabs
A Prefab is a pre-made blueprint for a game object that can be used repeatedly to create instances of that object with the same properties and behaviors. We could for example create a prefab of our random walker with the green material and the RandomWalker script attached.
Please first create a Folder called "Prefabs" if you don't have such a folder in Assets.
We create a prefab, by dragging a GameObject from the Hierarchy to the Assets window, ideally into the folder called "Prefabs"
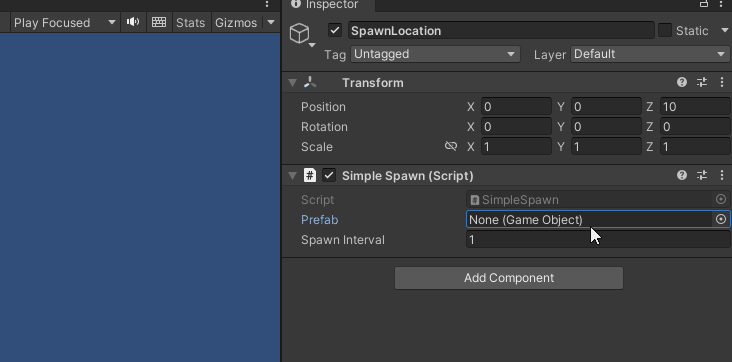
Creating a spawn location
Create an Empty GameObject with Ctrl+Shift+N or GameObject (top bar) -> Create Empty
Name it "SpawnLocation"
Set its Transform component to 0,0,15 in the Inspector (the position of the Camera at 0 , 0 , 0)
In the Inspector click "Add Component", type SimpleSpawn and press the enter key to create a new Script with the name "SimpleSpawn"
Copy the following code into the script:
using System.Collections;
using System.Collections.Generic;
using UnityEngine;
public class SimpleSpawn : MonoBehaviour
{
// Start is called before the first frame update
public GameObject prefab;
public float spawnInterval = 1.0f;
void Start()
{
InvokeRepeating("spawnObject", spawnInterval, spawnInterval);
}
void spawnObject()
{
Instantiate(prefab, transform.position, transform.rotation);
}
}Instantiating a Prefab at a spawn location
In the Inspector under the "Simple Spawn" Script component assign under Prefab our RandomWalker Prefab.
Adding functionality to classes while adhering to their anatomy
When extending the functionality of C# scripts, our added code needs to comply with the basic anatomy, syntax, and naming conventions.
When we create Instances of Prefabs at a spawn location, we want to destroy them at some point trough mechanisms like a 'lifetime' property.
One way to do this is adding some functionality to our Random Walker class.
adding an expiry date to our random walkers
Open the Random Walker Script and after the Class Declaration add:
public float lifetime = 5f; //the lifetime of the GameObject
private float age = 0f; //the age of the GameObjectIn the Update ( ) function add:
age += Time.deltaTime;
if (age >= lifetime)
{
Destroy(gameObject);
}Now, every lifetime seconds, the spawned game objects get destroyed.
Making random walkers fade away instead of disappearing instantly
When our 'random walkers' expire into the ether, it might be more appropriate to just let them fade out instead of seeing them instantly disappear, whenever age >= lifetime is fulfilled and dictates them to be destroyed.
first, we need an additional variable after the class declaration:
public float fadeTime = 3f;Then we'll add a coroutine with IEnumerator, add the following block after the last closing bracket } of the Update() function:
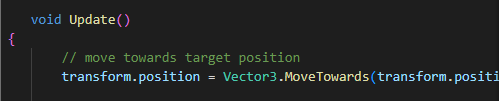
IEnumerator FadeOutAndDestroy() {
Renderer renderer = GetComponent<Renderer>(); // get the renderer component
Color currentColor = renderer.material.color; // get the current color of the material
currentColor.a = 1f; // set the alpha to 1 (opaque)
while (currentColor.a > 0) { // loop until the alpha is 0 (invisible)
currentColor.a -= Time.deltaTime / fadeTime; // fade out the alpha over time
renderer.material.color = currentColor; // set the new color of the material
yield return null; // wait for the next frame
}
Destroy(gameObject); // destroy the game object
}Now we have to make a modification to the Update() function. Instead of Destroy(gameObject) when the condition of the if statement (age >= lifetime) is met, we have to start the coroutine that will fade out the instance and then destroy it! Replace the if statement as follows:
if (age >= lifetime && destroyable)
{
StartCoroutine(FadeOutAndDestroy());
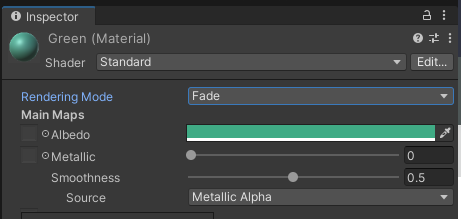
}this will only work if Material is set to Fade in the inspector:
Anatomy of Unity C# Scripts
In Unity game engine, C# scripts are used to add logic and behavior to game objects. Here is a basic anatomy of a C# script in Unity:
-
Namespace Declaration:
A C# script usually starts with a namespace declaration, which is a container that groups related code elements, such as classes and functions, into a named scope. For example:

-
Class Declaration:
Within the namespace, the script should contain at least one class declaration, which defines the behavior and properties of a game object. For example:

-
Variables:
The class may contain variables, which are used to store data that can be accessed and modified by the class's methods. Variables can be declared as public, private, or protected, depending on their accessibility. For example:

-
Methods:
The class may also contain methods, which are functions that define the behavior of the game object. Methods can be declared as public, private, or protected, depending on their accessibility. For example:

-
Start and Update Methods:
Two special methods that are commonly used in Unity scripts are the Start() and Update() methods. The Start() method is called once when the game object is created, and the Update() method is called once per frame. These methods can be used to initialize variables, update the game object's position, or interact with other game objects. For example:

-
Event Functions
The class may contain event functions, which are special methods that are automatically called by Unity in response to certain events, such as collisions, triggers, or input. For example:

Detecting Collisions
The OnCollisionEnter method can be used to detect a collision of a GameObject with another GameObject. In this example we are also using the GetComponent<Renderer>() method to access the object's renderer component, which controls its visual appearance.
We create a new script with the name ChangeColorOnCollision.
Add the following code to the script:
public class ChangeColorOnCollision : MonoBehaviour {
private Renderer objectRenderer;
public Color newColor;
void Start() {
objectRenderer = GetComponent<Renderer>();
}
void OnCollisionEnter(Collision collision) {
if (collision.gameObject.tag == "wall") {
objectRenderer.material.color = newColor;
}
}
}In the Inspector tag the obstacle - in our case our frame as 'wall'
[Exercise ] asset management and the Unity-Blender pipeline
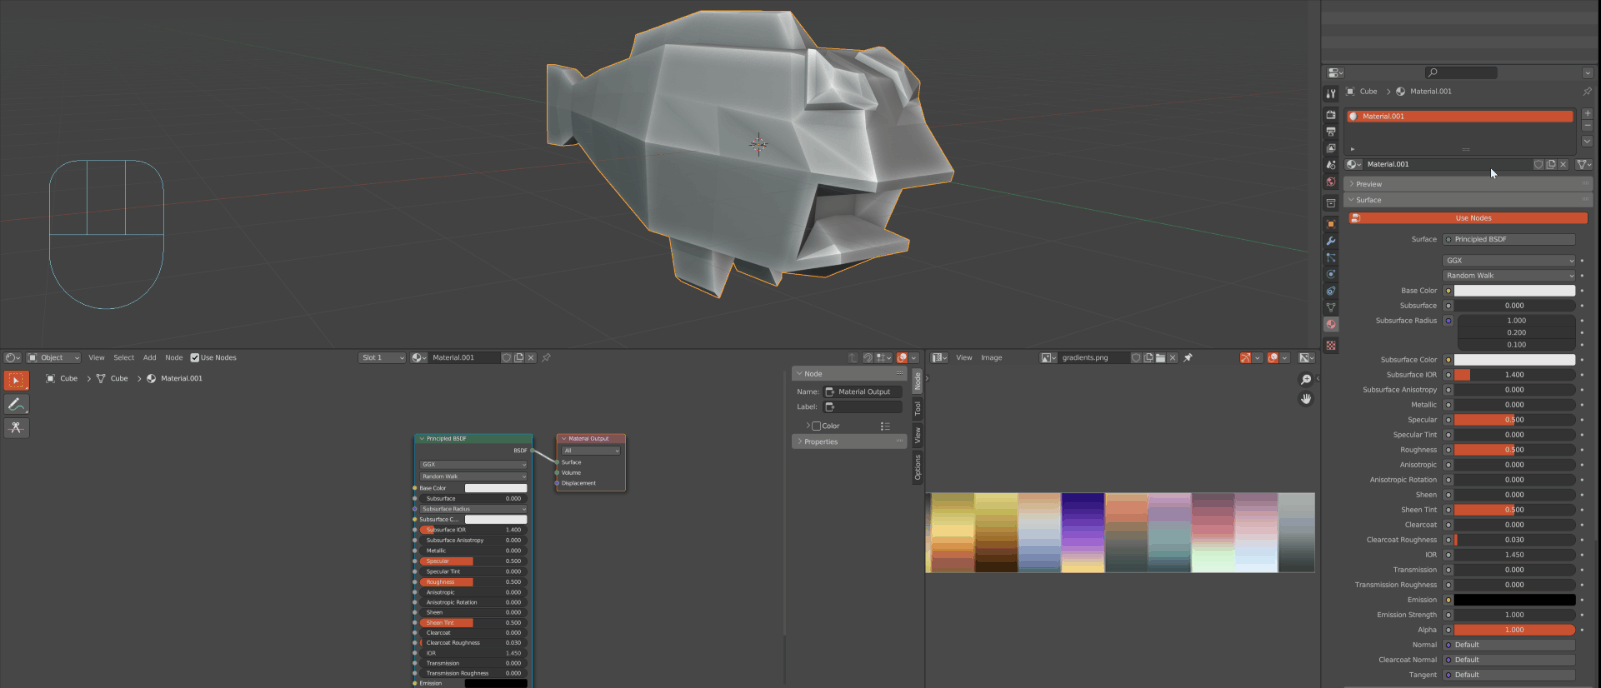
A small introduction into asset management and importing textures, their UV maps, rigs and animations from Blender or other 3D Modelling software into Unity. The model and the assets are based on this youtube tutorial
Blender files
|
|
 |
| Initial setup in Blender 3.5 | 3D model no texture, no rig |
| Download *.blend file | Download *.blend file |

 |
|
| Rigged and textured but not animated | Rigged, textured, animated |
| Download *.blend file | Download *.blend file |

Unity Package
|
|
|
| Unity package file | Only the *.fbx file |
| Download *.unitypackage | Download *.fbx |


Go to Project folder Adversarial Animation on Sciebo
Step by step
enabling the Auto Mirror Add-On
Creating subdivisions

|
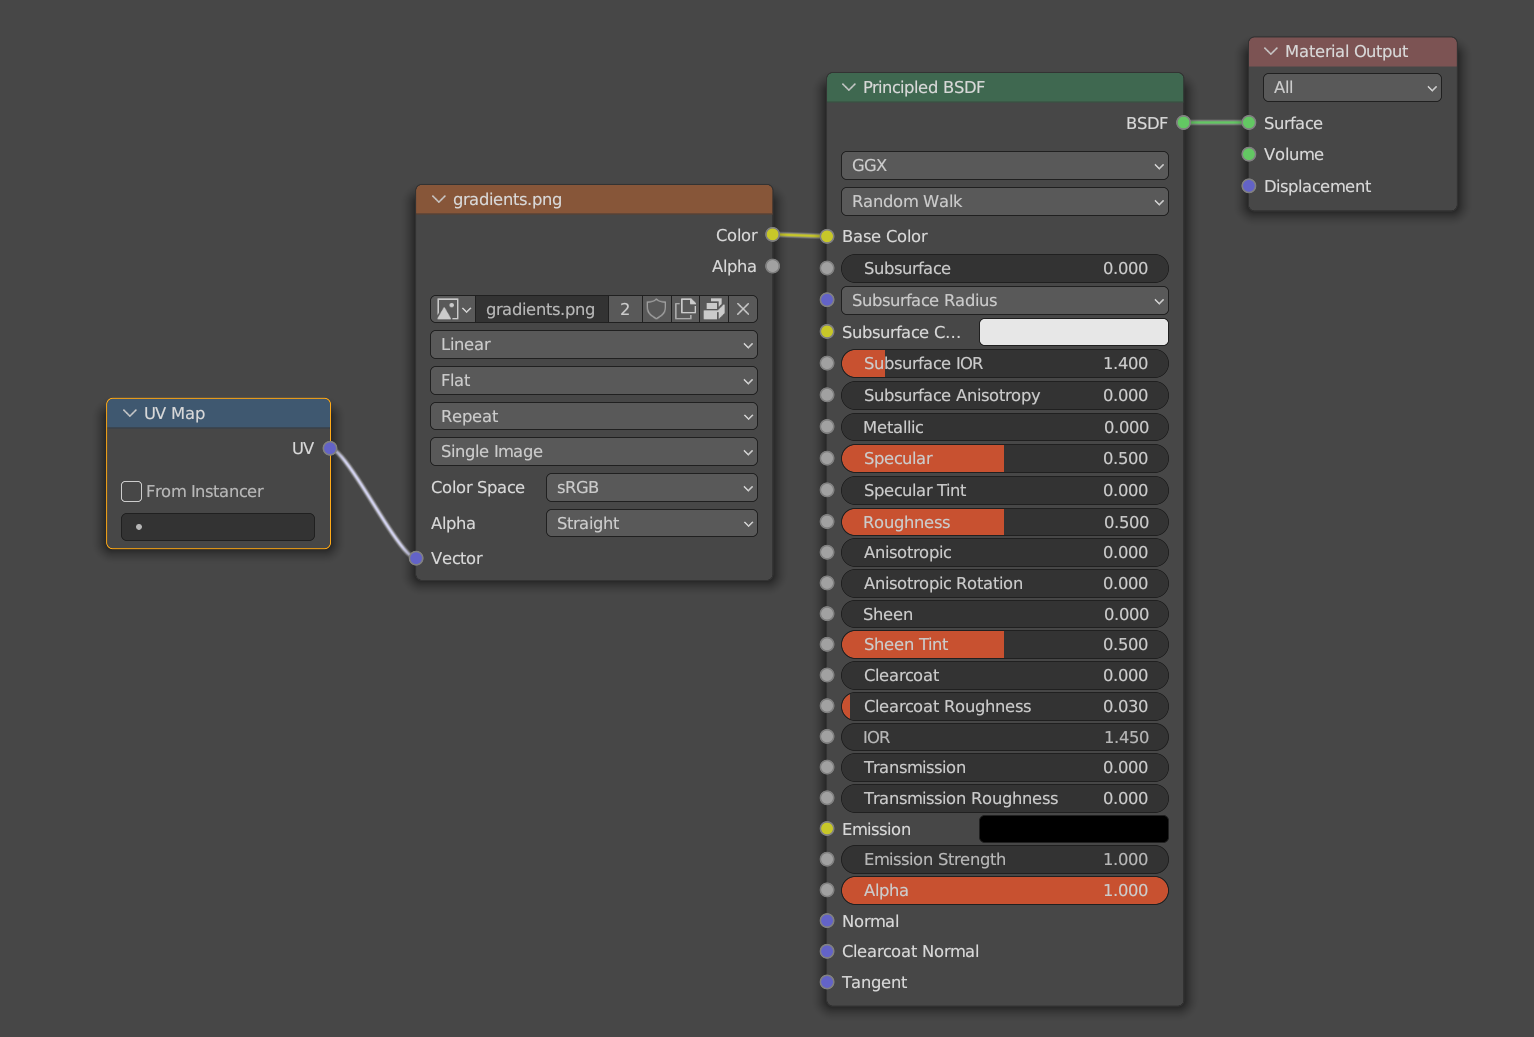
Setting up the Material
|
Creature with hinge joints
Step 01 - download unity package
- Create a new
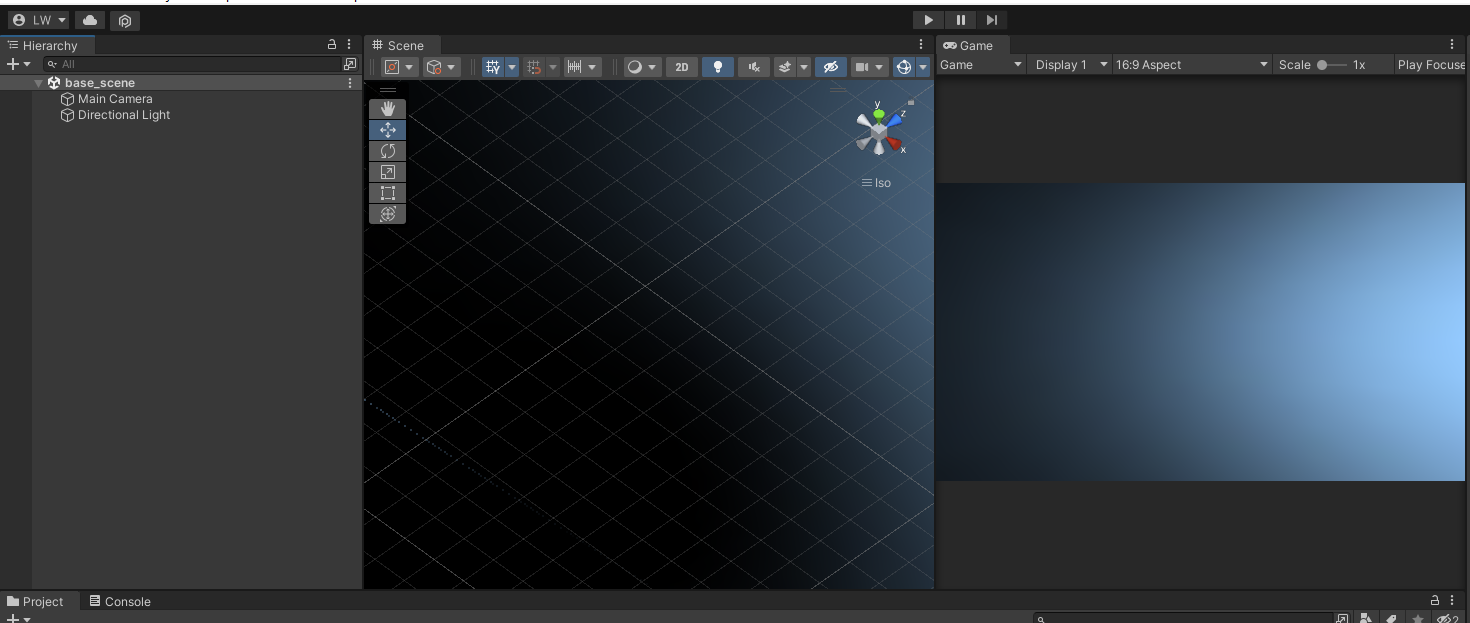
3DUnity project 2021.3.15f - If you want to follow along, download the base scene unitypackage
- Import the unity package
- open base scene
Step 02 - Creature Script
- create a new script in the Folder 'Scripts'
- Call it "RandomSnake"
- copy the following code into in
using System.Collections;
using System.Collections.Generic;
using UnityEngine;
public class RandomSnake : MonoBehaviour
{
public GameObject headPrefab;
public GameObject segmentPrefab;
public int segmentCount;
public float speed;
public float damper;
public float spring;
public float changeDirectionTime = 1.0f;
private List<GameObject> segments = new List<GameObject>();
private GameObject head;
private Vector3 randomDirection;
private float timeSinceLastDirectionChange;
void Start()
{
// Create head and add it to the segments list
head = Instantiate(headPrefab, transform);
segments.Add(head);
// Create the segments and connect them with hinge joints
for (int i = 0; i < segmentCount; i++)
{
GameObject segment = Instantiate(segmentPrefab, transform);
HingeJoint hingeJoint = segment.AddComponent<HingeJoint>();
hingeJoint.connectedBody = segments[i].GetComponent<Rigidbody>();
hingeJoint.autoConfigureConnectedAnchor = false;
hingeJoint.anchor = new Vector3(0, 0.5f, 0);
hingeJoint.connectedAnchor = new Vector3(0, -0.5f, 0);
hingeJoint.axis = new Vector3(1, 0, 0);
JointSpring jointSpring = hingeJoint.spring;
jointSpring.damper = damper;
jointSpring.spring = spring;
hingeJoint.spring = jointSpring;
hingeJoint.useSpring = true;
segments.Add(segment);
}
// Initialize random direction and timer
randomDirection = Random.insideUnitSphere.normalized;
timeSinceLastDirectionChange = 0;
}
void Update()
{
// Move the head in a random direction
head.GetComponent<Rigidbody>().velocity = randomDirection * speed;
// Update timer and change direction if needed
timeSinceLastDirectionChange += Time.deltaTime;
if (timeSinceLastDirectionChange >= changeDirectionTime)
{
randomDirection = Random.insideUnitSphere.normalized;
timeSinceLastDirectionChange = 0;
}
}
}
Step 03 - Prefabs
- Create a prefab for the head
- Create a prefab for the body segments
- add a rigidbody to both the head and the body prefabs
"use gravity" and "use kinematic" must be disabled for the rigidbody componens!
Step 04 - Creature Prefab
- Add an empty GameObject to the scene at 0,0,0 (Camera should be at 0,0,-10)
- Rename it "Creature"
- Add the "RandomSnake" Script to the Creature GameObject in your scene
- In the Inspector assign the "head" and "segment" prefabs respectively
- insert a segment count and values for speed, damper, and direction change time
- Try out which values work best
- When good values are determined, drag the Creature GameObject into Assets/Prefabs to make it a prefab
explanation for hinge joint settings
In the given script, the spring parameter affects the stiffness of the spring component within the HingeJoint that connects the segments of the creature. The spring force tries to maintain the joint angle at a target angle, which is initially set to zero. When the joint angle deviates from the target angle due to the movement of the connected bodies, the spring force acts to bring the joint angle back to the target angle.
The higher the value of the spring parameter, the stiffer the spring will be, and the more force will be exerted to maintain the joint angle at the target angle.
A higher spring value will cause the segments to maintain their relative positions more tightly, leading to a more rigid movement. On the other hand, a lower spring value will make the segments more loosely connected, allowing them to deviate further from their original positions relative to each other, leading to a more flexible movement.
Step 05 - Spawn Location
- Create a new empty GameObject and rename it to SpawnLocation
- Assign the SimpleSpawn script
- Adjust the SimpleSpawn script to add lifetime and fade the material at it's end
- here is some info on how you can add lifetime to the creatures
TASK:
Create 3D Models for the head and segment prefabs with a 3D software of your choice. Import them, set them up as prefabs and assign them in the Inspector.
Alternatively you can also apply your own design of a creature by setting up and importing a rigged animation, like in the example with the Fish from last week, or create an entirely different script with different behavior.
PROJECT FILES
unitypackage with all scripts and assets
Unity ML Agents
Downloads
Download
Download the latest release from this Github page
unzip
unzip it to C:\Users\YOUR USERNAME\ (Windows)
For Linux and Mac save unzip it to 'home' directory
now you will have a folder there called: ml-agents-release_20
Installations: Anaconda and Python
Anaconda itself is a Python distribution, but it is not recommended to add it to path. We install Python after our Anaconda installation so that python commands can be executed systemwide, but conda commands only when using conda shell, to prevent any interference with other applications using Python.
Conda environment configuration
create conda environment
conda create -n ml-agents python=3.8activate conda environment
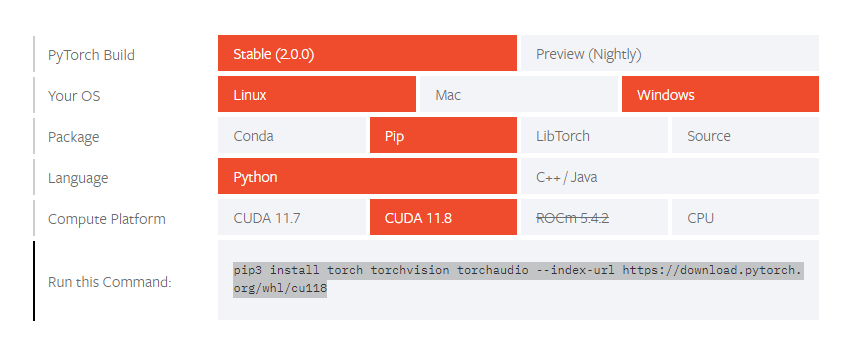
conda activate ml-agentsinstall pytorch
install Unity ML Agents:
cd ml-agents-release_20/ml-agents-release_20pip3 install -e ./ml-agents-envspip3 install -e ./ml-agentsDowngrade protobuf and install onnx module
pip install protobuf==3.20pip install onnxUnity project configuration
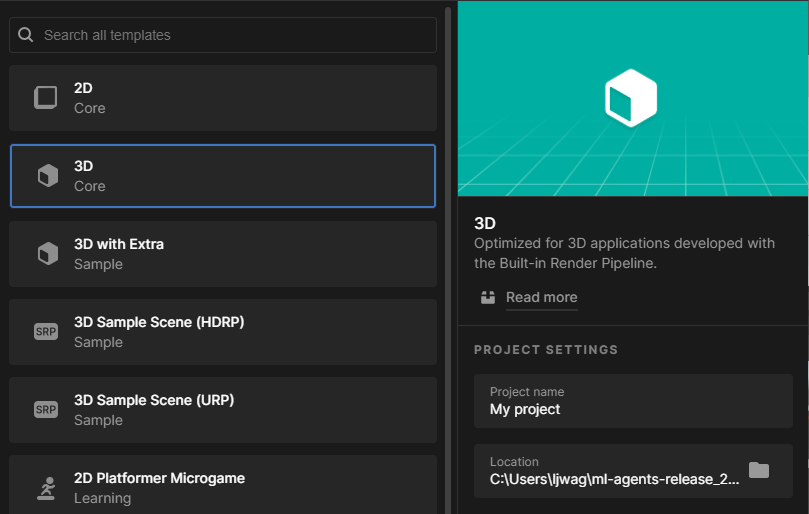
Create a new unity 3D project with an editor version later than 2020 here I use 2021.03.15f1
Under "Location" choose the ml-agents-release-20 folder that you have in your home directory.
in the newly created Unityproject Install the ML Agents Unitypackage:

Go to window -> package manager -> + -> install from disk
navigate to C:/Users/ml-agents-release-20/ml-agents-release-20/com.unit.ml-agents and click on the package.json
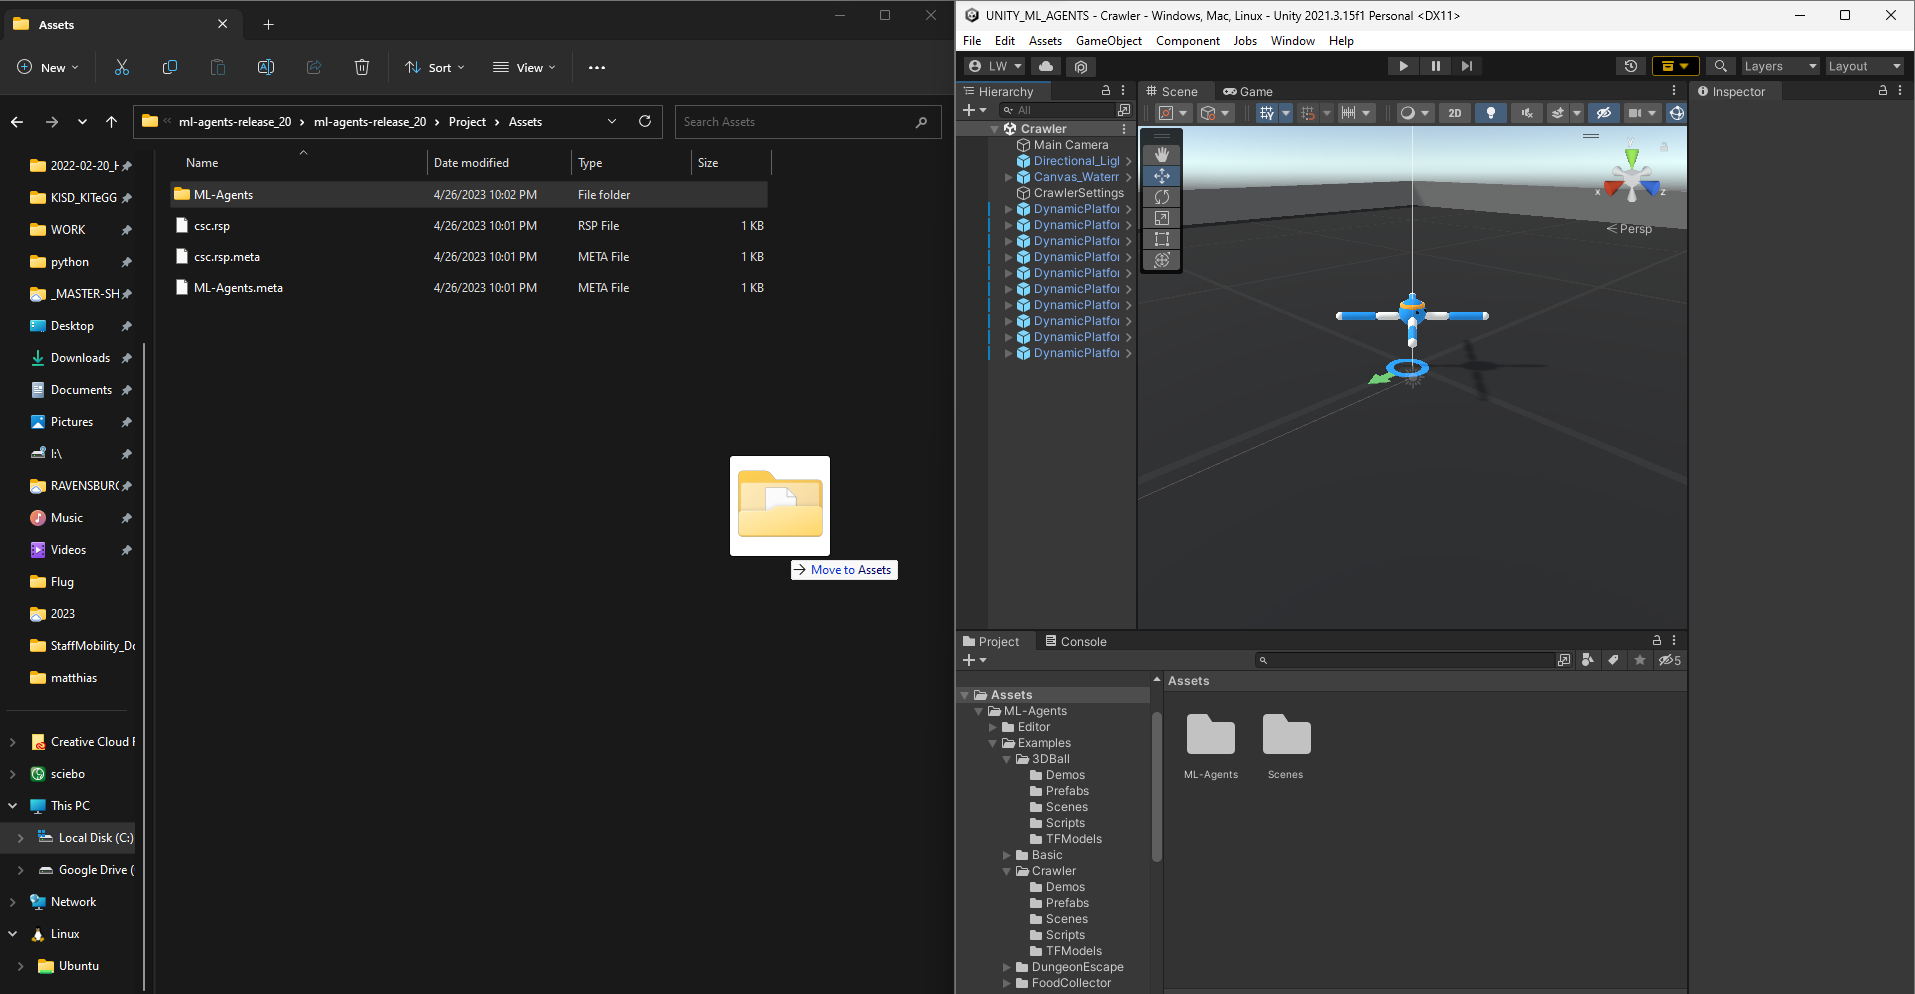
Copy the ml agents assets to your unity project
in your file system navigate to
C:\Users\YOUR_USERNAME\ml-agents-release_20\ml-agents-release_20\Project\Assets
find the folder ML-Agents 📁 and drag it into your newly created and open unity project into the 'Assets' window.
Training the agents
activate the conda environment
conda activate ml-agentsstart the training with conda shell
cd ml-agents-release_20/ml-agents-release_20mlagents-learn config/ppo/Walker.yaml --run-id=walker-001[experiment] copying movement to a humanoid character
script for copying rotation and location:
using UnityEngine;
public class FollowObject : MonoBehaviour
{
public GameObject objectToFollow;
public Vector3 offset;
public bool copyPosition = true;
public bool copyRotation = true;
private void Update()
{
if (copyPosition)
{
transform.position = objectToFollow.transform.position + offset;
}
if (copyRotation)
{
transform.rotation = objectToFollow.transform.rotation;
}
}
}